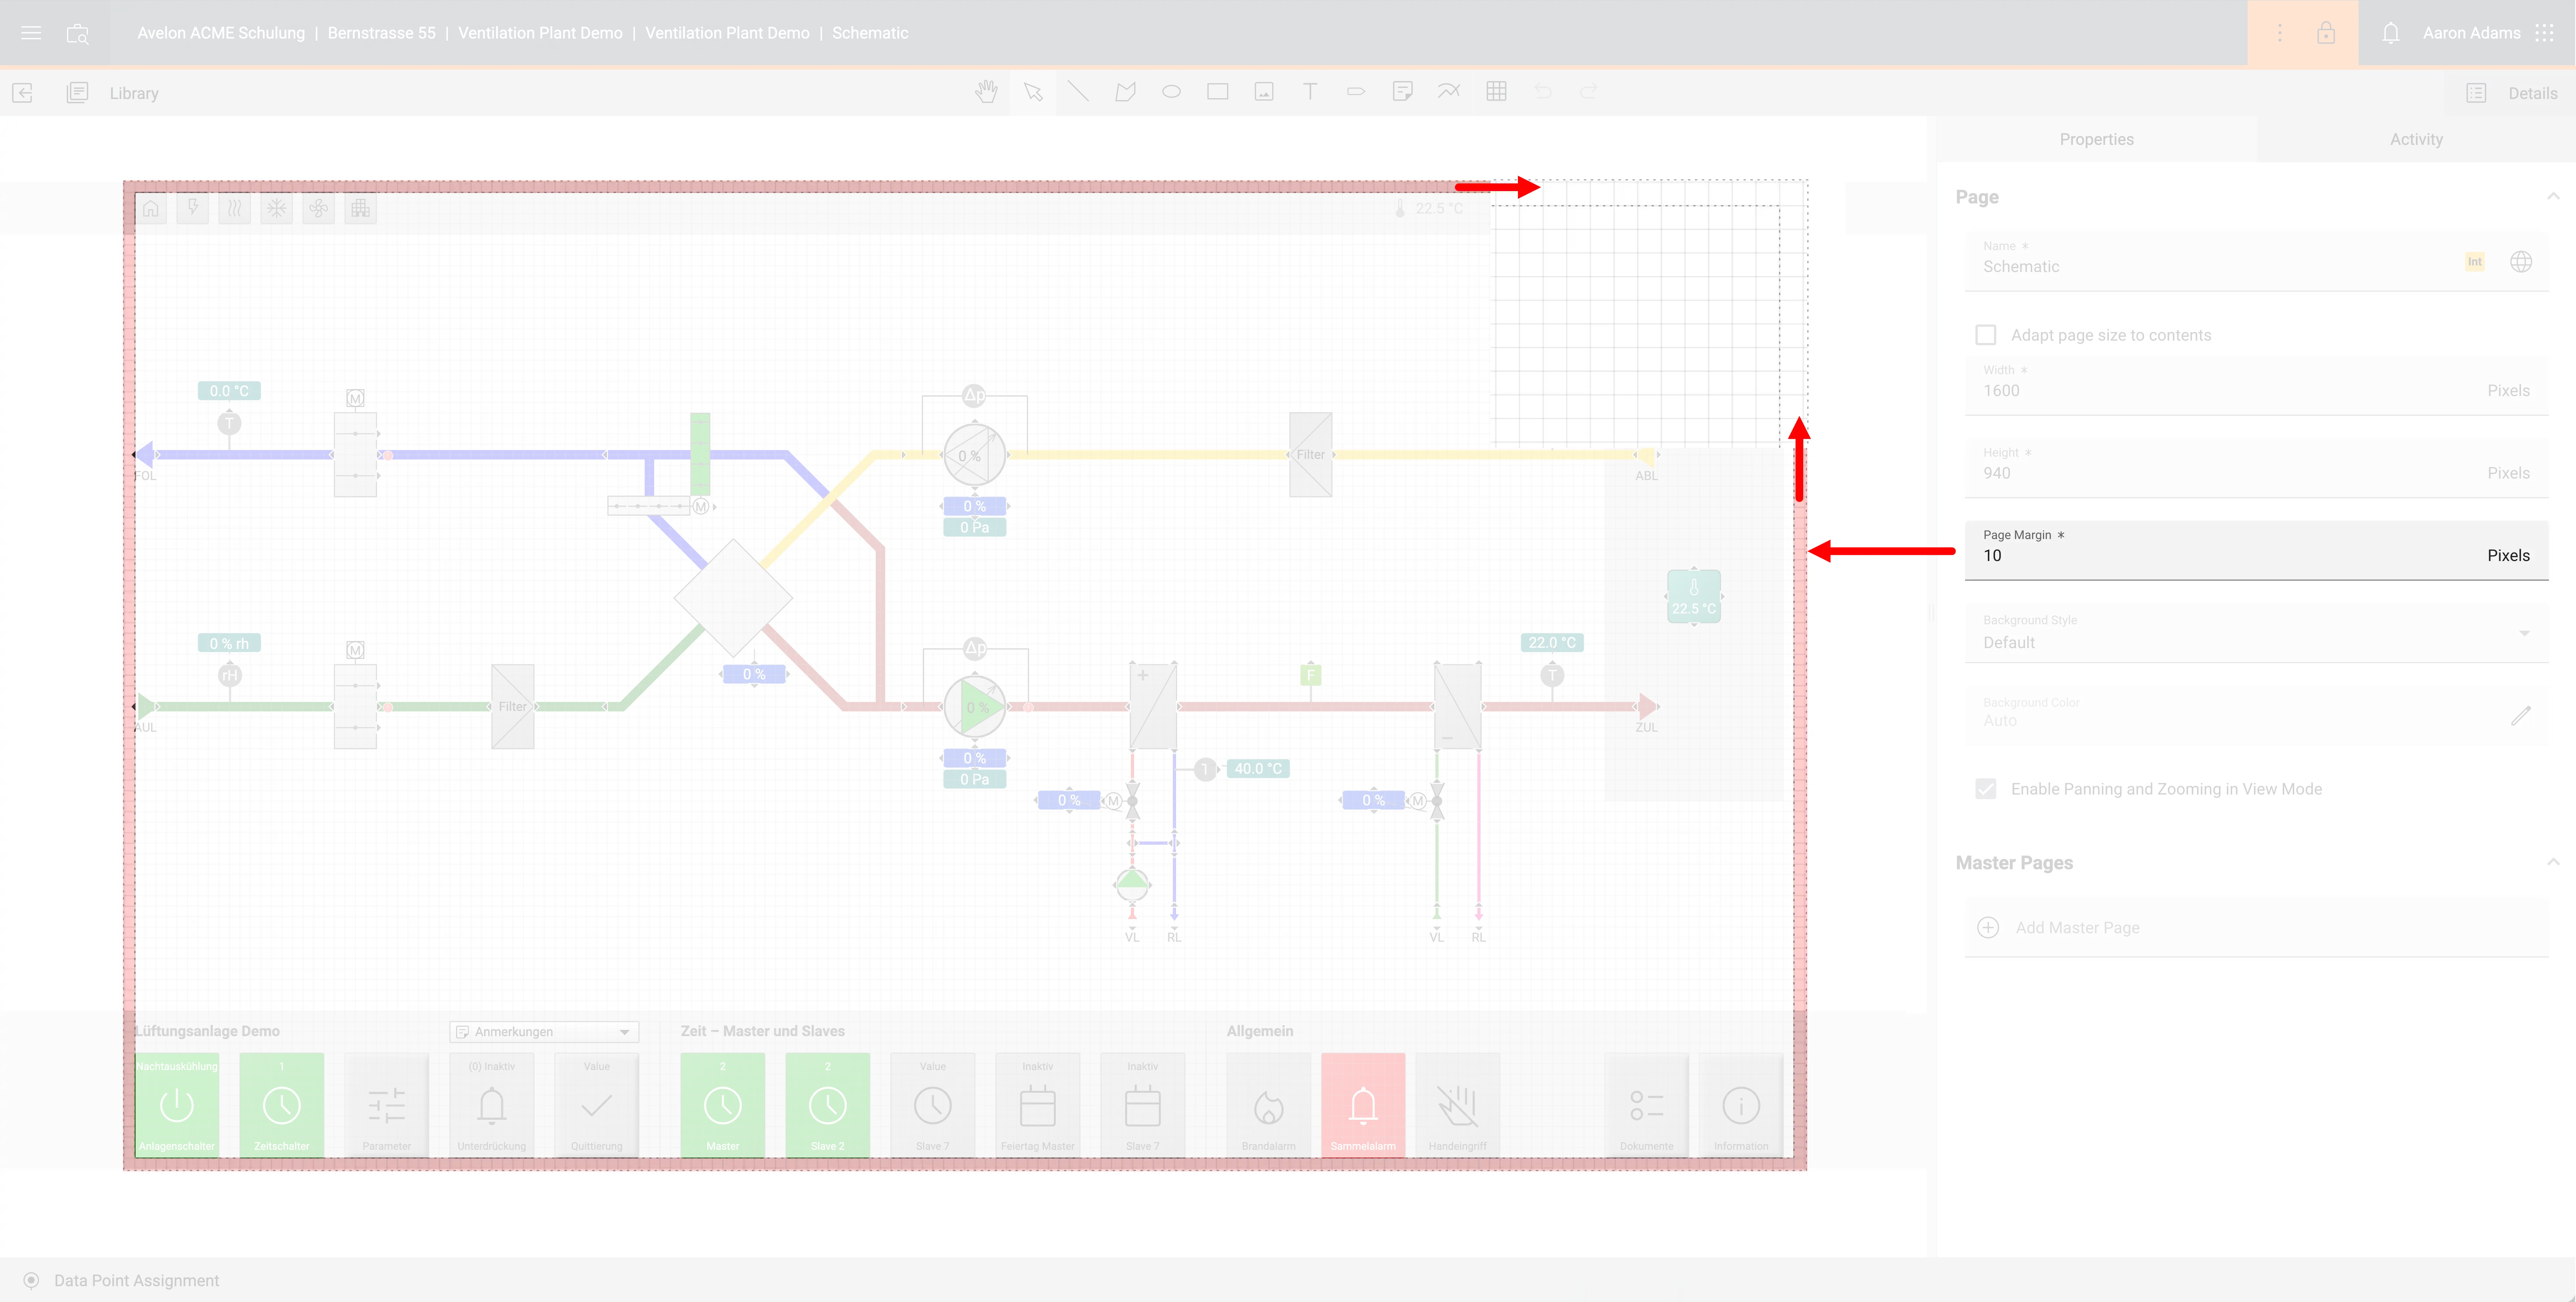
Page settings
If you want to edit the size or the general appearance of the page, click on an empty area on the worksheet. The following configuration options are then displayed in the Properties panel on the righ thand side:
- Name
The name of the schematic.
- Adapt page size to contents
If this option is enabled, the size of the worksheet is automatically determined by the outermost shapes. Enlarge the worksheet by simply dragging the shapes further out. If you prefer to work with a fixed worksheet size, disable this option and set the height and width of the worksheet instead.
- Width and height
Set the size of the worksheet in pixels.
- Page Margin
Set the margin of the schematic in pixels. The margin is an area around the schematic where no shapes should be placed, to ensure that there’s a gap between the outermost shapes and the edge of the page, to prevent the outermost shapes from touching the edges.
If the option Adapt page size to contents is enabled on the page, this margin will automatically be added when the schematic is displayed in view mode.
If the option Adapt page size to contents is disabled, the margin will be displayed as a dotted line on the schematic in edit mode. This acts as a guideline to help you keep a consistent margin along the edges of the page, but it has no effect on the actual size of the page.
- Master Pages
Select which master pages are to be displayed in the background. You cannot manipulate the shapes on master pages directly, but you can overwrite data points of these shapes locally. The master pages will be layered on top of one another in the order they are assigned. You can change the order by dragging them in the list.
Warning
Information about using master pages: Shapes can only be edited on the page on which they were originally placed.
- Background Style
Select how the background of the schematic is to be displayed on the dashboard. You can select among five pre-defined styles, which will automatically adapt to the current theme.
Background styles depending on the current theme Style
Light mode
Dark mode
Default
Semi-transparent
Transparent
Linear gradient
Radial gradient
Note that these are subtle, pre-defined styles, which cannot be customized. The purpose of these styles is to give your schematic widgets a subtle background to keep them visually apart from each other on the dashboard, while keeping their ability to adapt to the user’s preferred mode and ensuring the best possible legibility and accessibility.
If you want to add a gradient background with custom colors, you can follow this guide, although we advise against it. The recommended setting is to leave the background color undefined, so that the browser can automatically find the best matching background color for the current mode, which usually results in the optimal contrast.
- Background Color
When no background color is set explicitly, the background color of the schematic will automatically adapt to the dashboard theme and the selected background style. This is the recommended settings for the best possible contrast and accessibility.
However, you can select a background color here to manually set the background to a specific color. If a color is selected, Backgound Style will be ignored. If a master page is assigned that has a background color set, its background color will automatically be applied to the current page, too. You can use this mechanism if you want to apply the same specific background color to several of your schematics.