Import and export schematics
If you want to copy or move a schematic from one dashboard to another, you can simply go to that particular dashboard, enable edit mode and click on the Move / Clone icon in the center of the respective widget.
Moving or copying a schematic widget inside the same client is straightforward, because the shapes still reference the same shape library. However, if you want to move or copy a schematic to another client or even to a different server, you’ll need to export the schematic and all the placed shapes first.
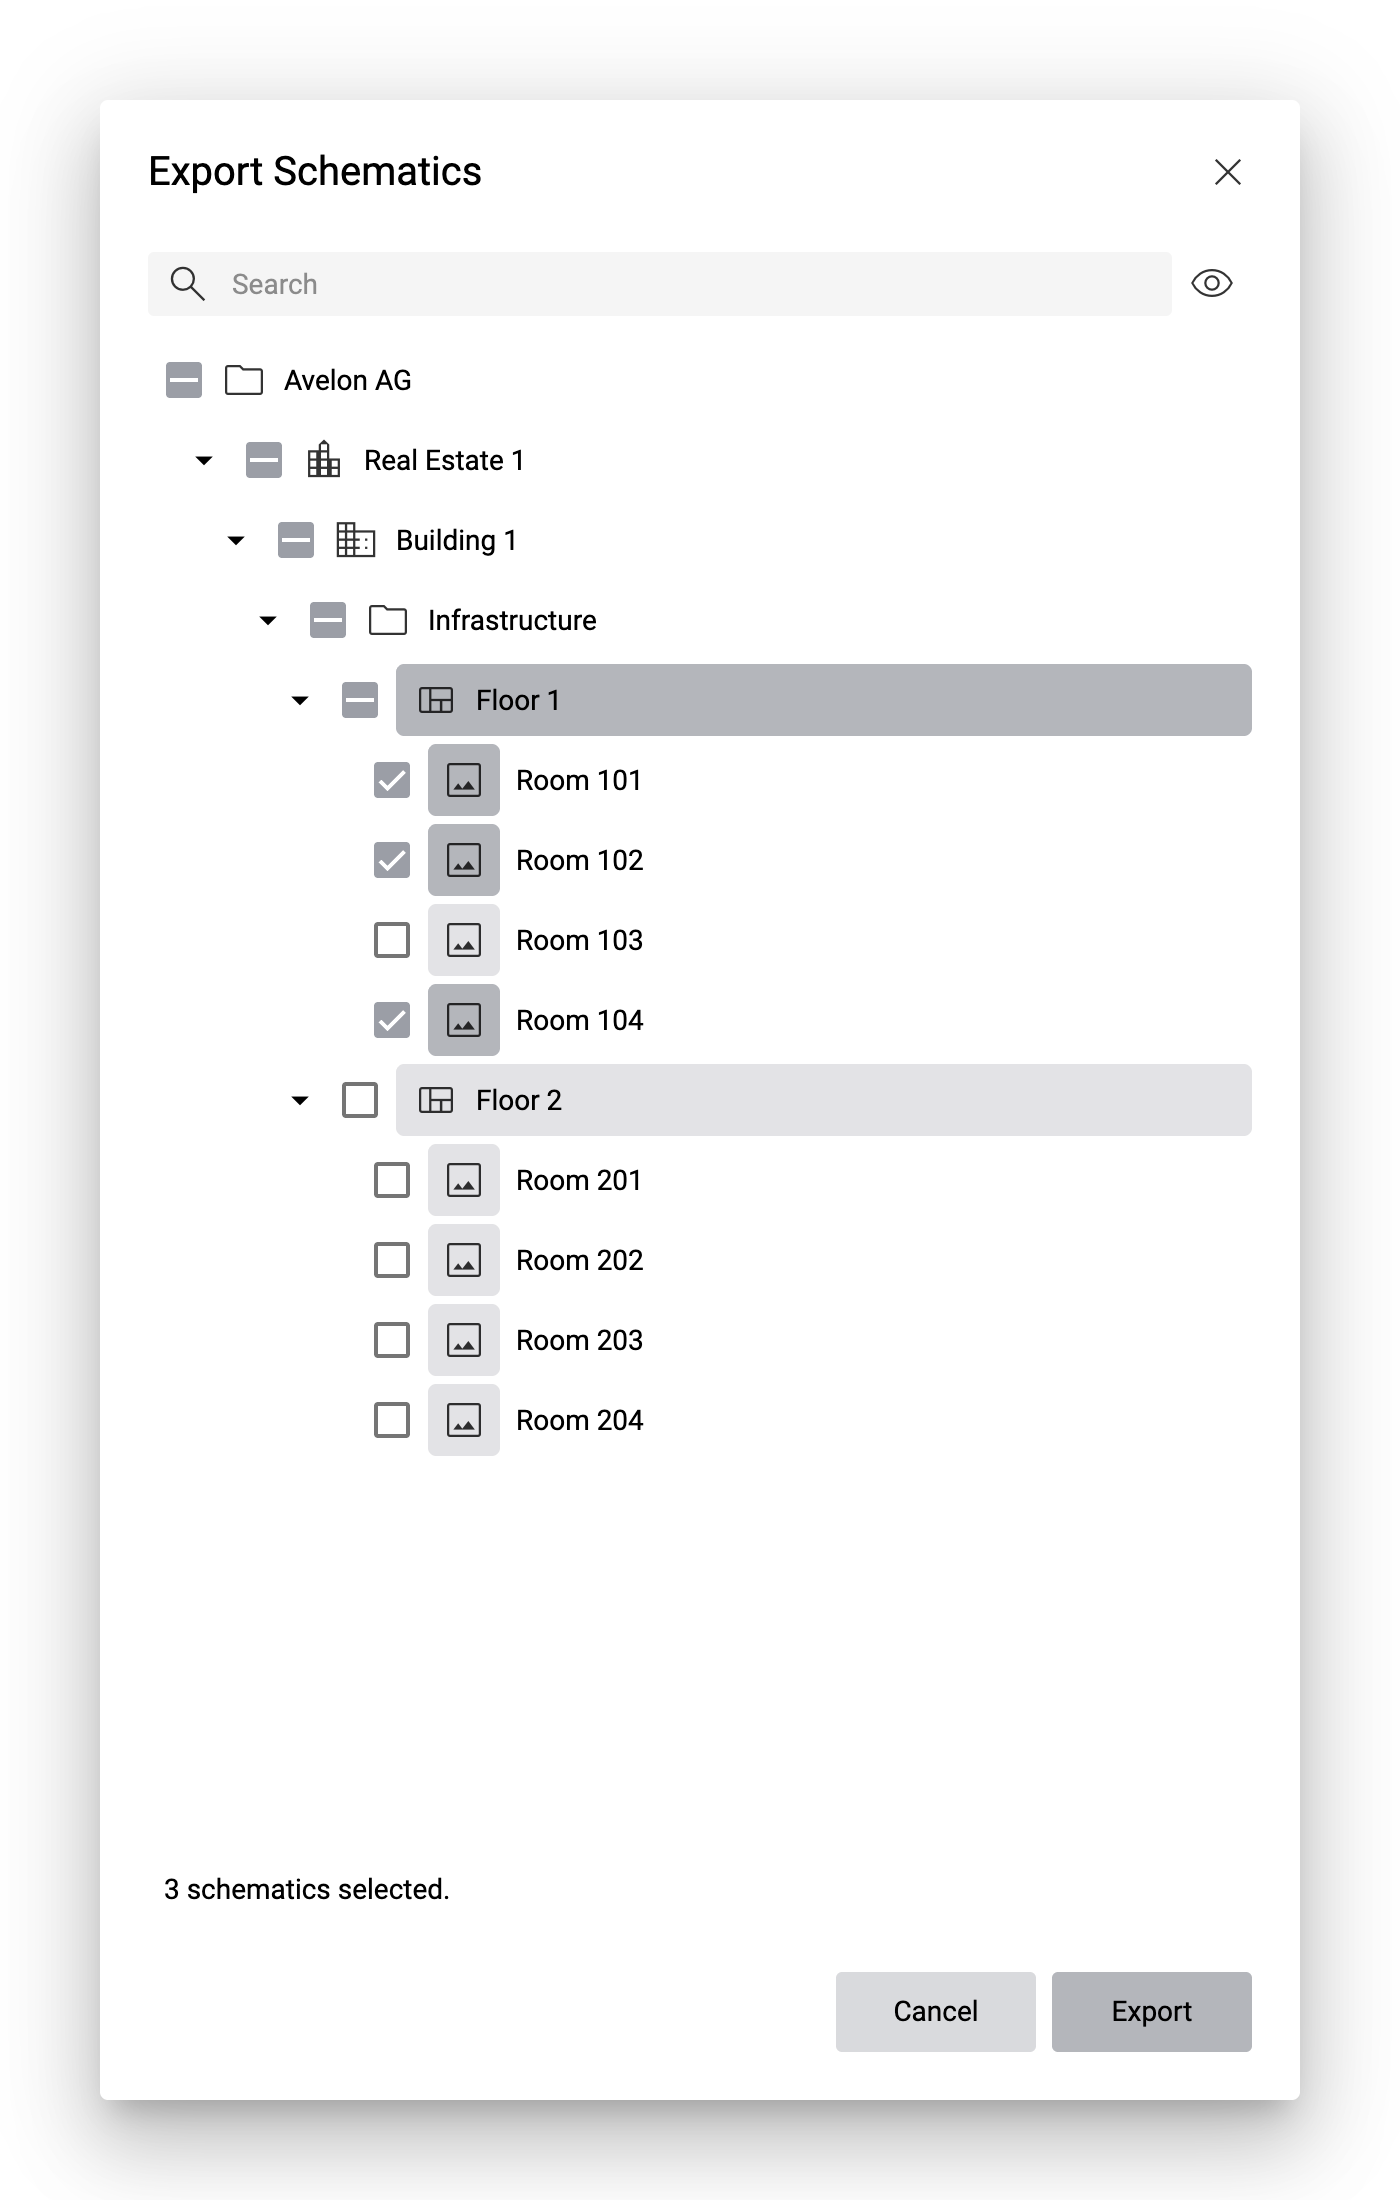
To export one or multiple schematics, navigate to one of the schematics you want to include in the export, and then click on More and then on Export Schematics.
In the Export Schematics dialog, you see the entire group tree with all the dashboards and schematics. The current schematic will be selected by default. You can select more schematics you want to export by checking the checkboxes next to them. Then click on Export to export and download them.
The resulting file will not only contain the selected schematics, but also all the shape and connection types from the shape library that are used in those schematics. The export also includes the data point assignments and master pages that are used in the schematics.
To import the exported schematics, go to the target client, navigate to any existing schematic and click on More in edit mode and then on Import Schematics. A wizard will guide you through the import process.
Note that the schematics will be imported into the same hierarchy of groups and dashboards as they were exported from. If those groups and dashboards don’t exist on the target client, they will be created during import.
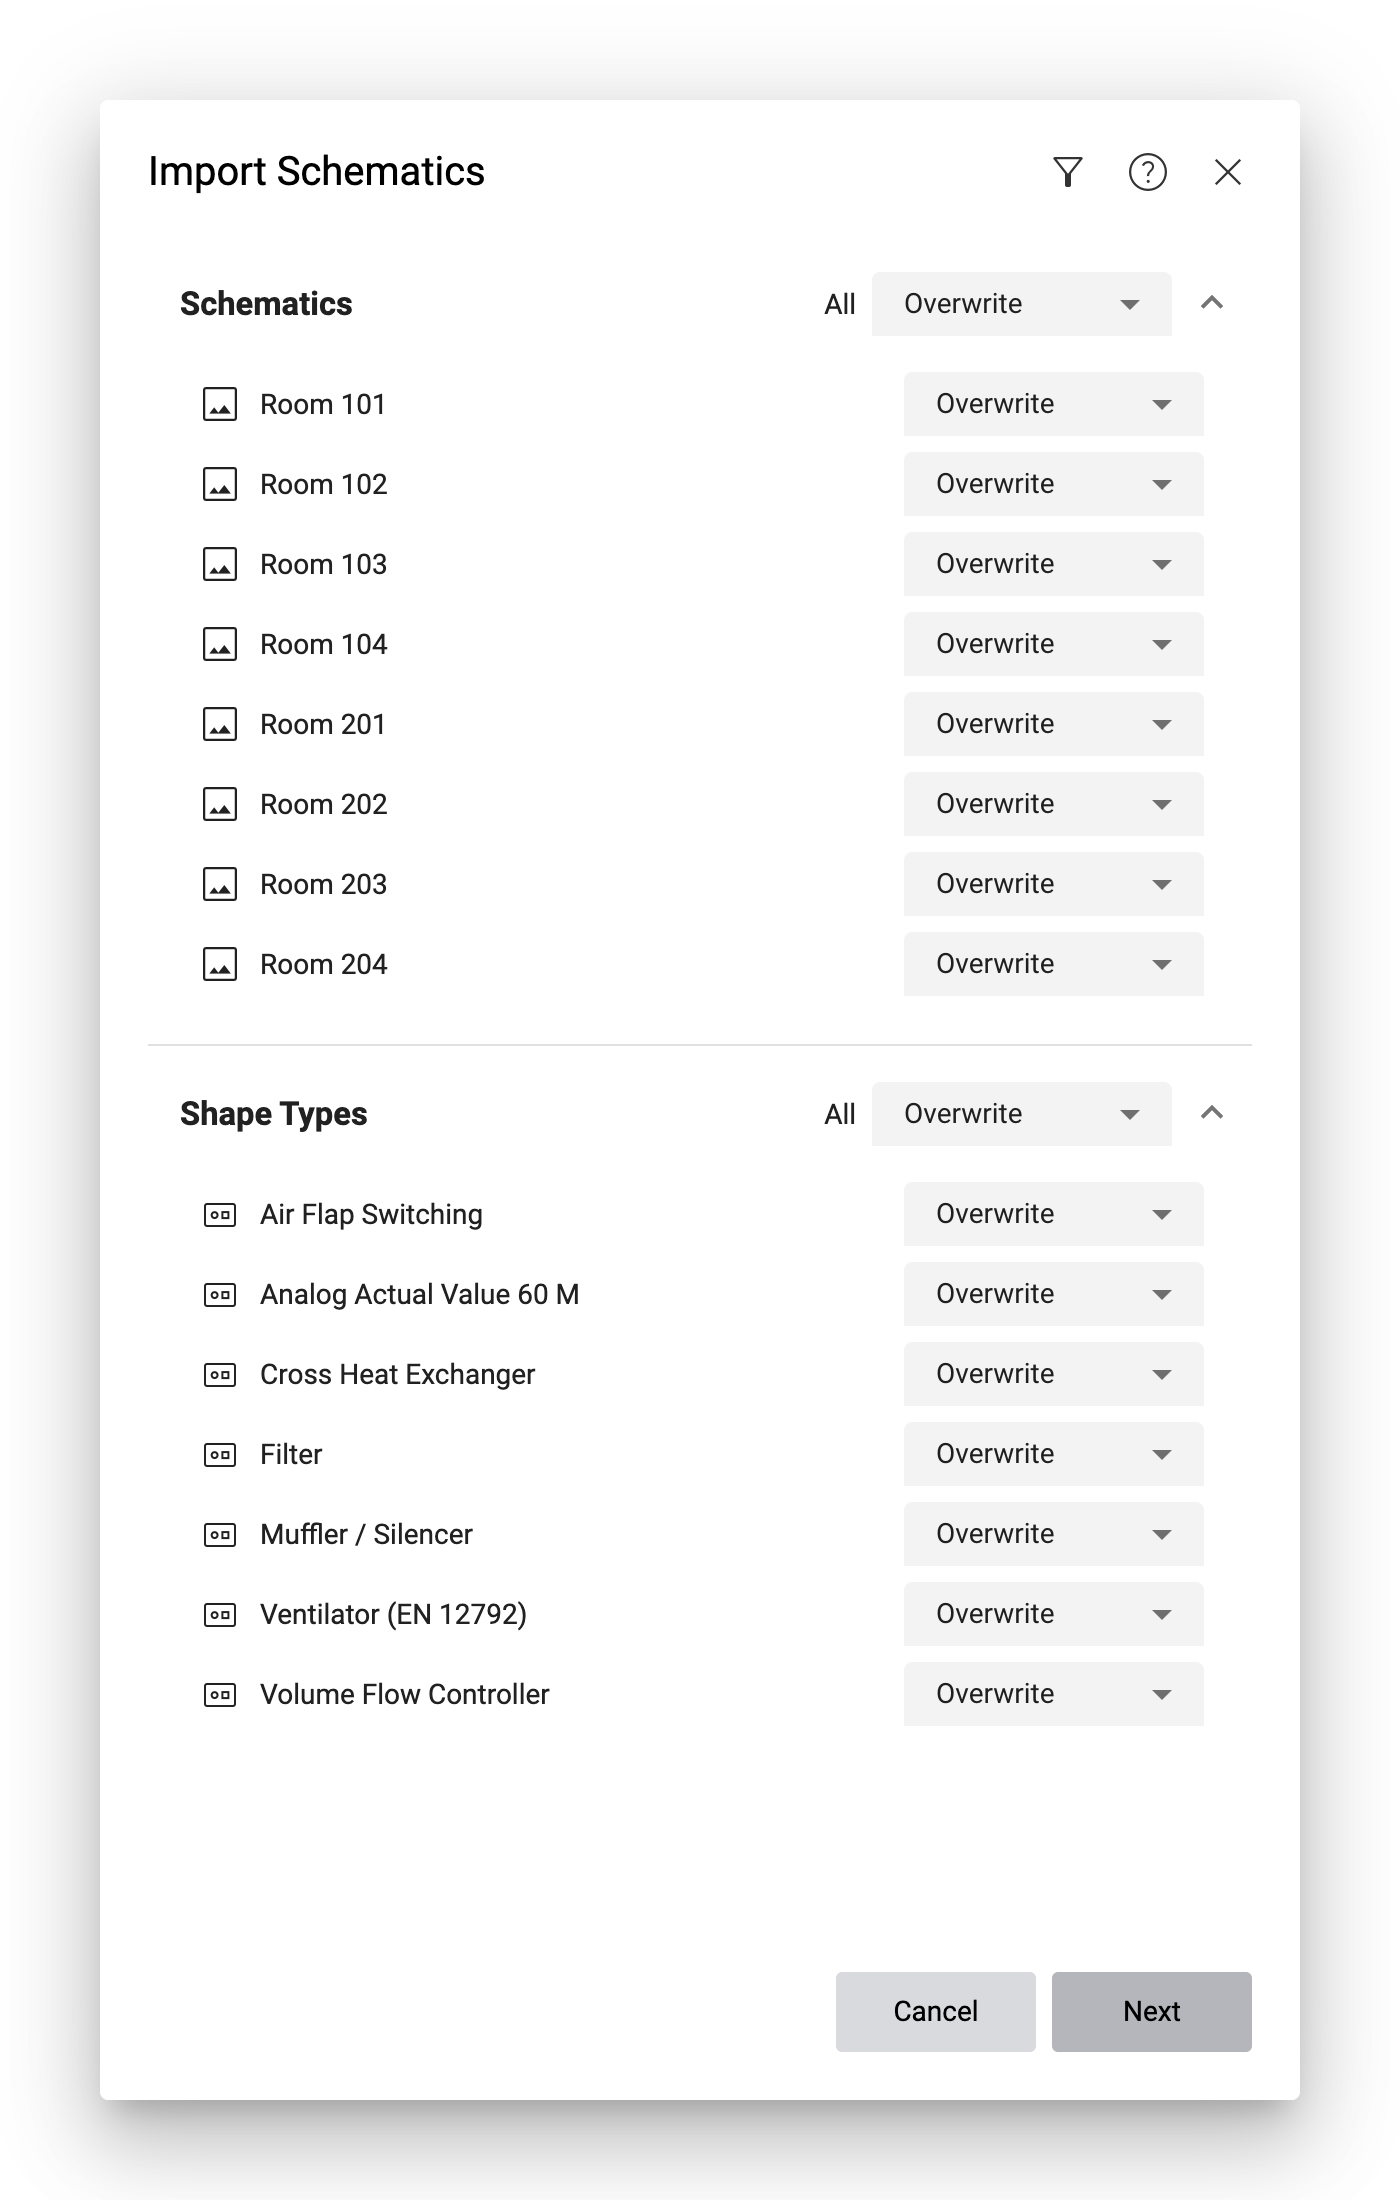
At the top of the dialog, you’ll see a list of all the schematics from the import. By default, existing schematics with the same name will be overwritten. You can change this behavior by selecting the option New from the dropdown, which will always create a new schematic.
Below the list of schematics, you’ll find a list of all the shape and connection types that were used in the schematic. Similar to the schematics, existing shape and connection types with the same name will be overwritten in the shape library of the target client. You can change this behavior by selecting the option New from the dropdown, which will always create a new copy of the shape or connection type in the shape library.
If the system encounters ambiguous items, e.g. multiple existing schematics on the target dashboard with the same name, or multiple existing groups with the same name, the corresponding item will be marked with a Warning icon. Note that these items will not be imported. If you want to import them, you’ll have to clean up your existing groups, dashboards and schematics and make sure that each of them has a unique name – on the source system as well as on the target system.
If everything is okay, click on Next to proceed to the next step.
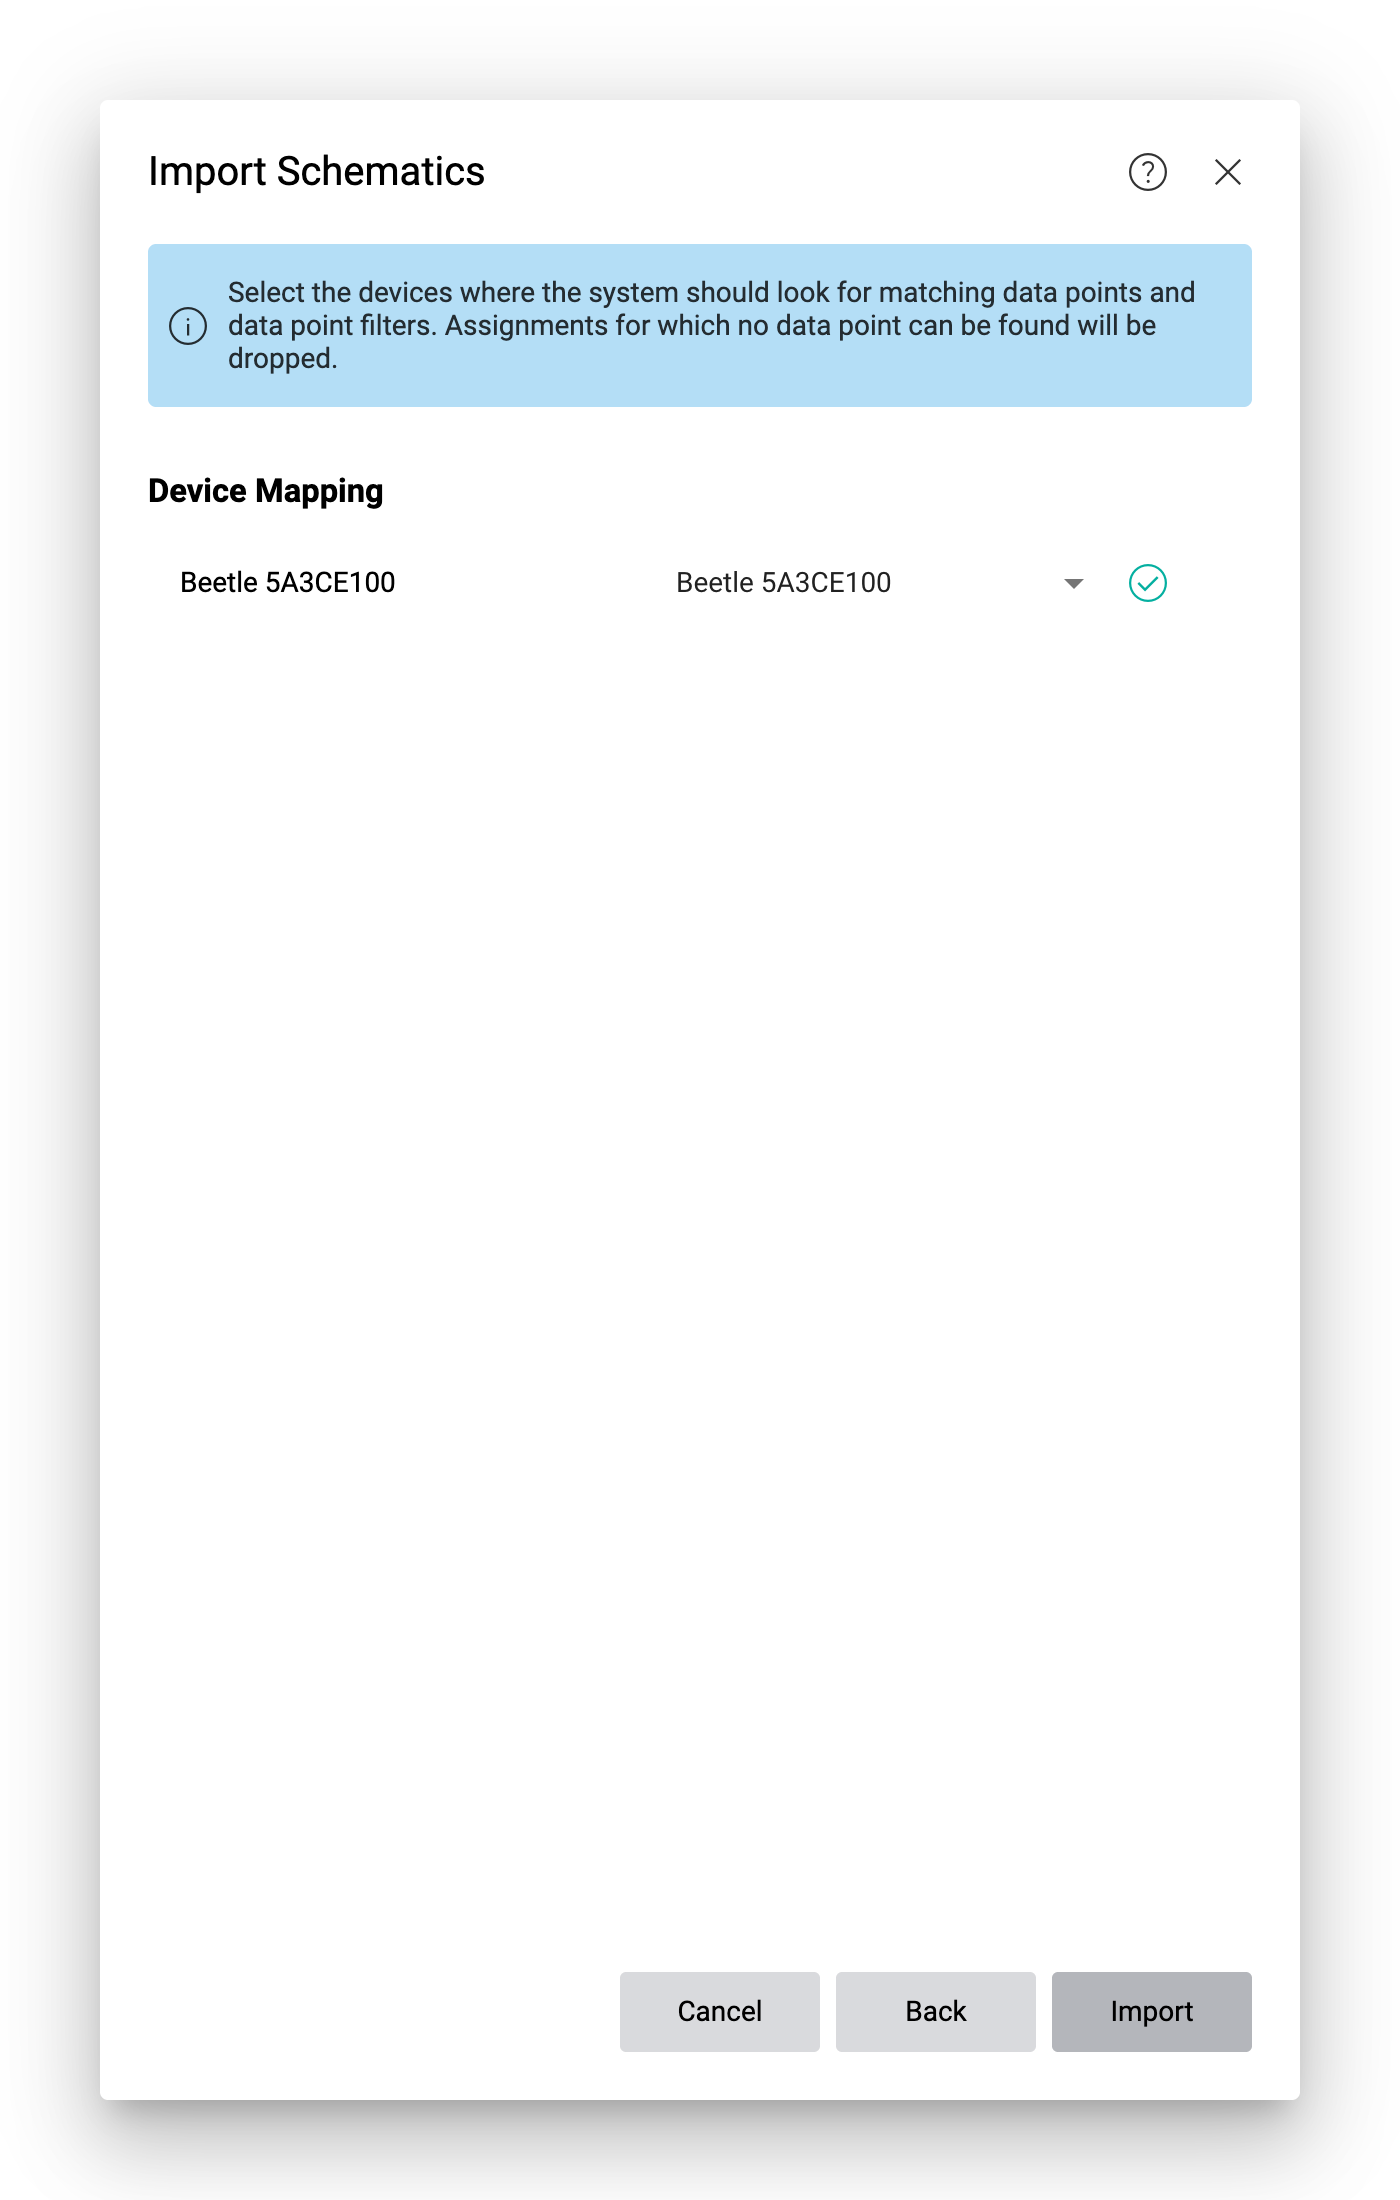
Here, you’ll be mapping the assigned data points from the source client to the target client. For each device from the source client, you have to select the corresponding device from the target client that contains data points with the same system names. The system will then try to match the data points automatically.
If a device on the target system has the same name as the device in the import file, it will be pre-selected automatically, but you can select a different device from the dropdown if necessary.
If all data points from the source client can be matched to data points from the target client, a green Check icon will be displayed next to the device name. If there are issues, they will be listed below the device as follows:
- Ambiguous data points and filter
Data points or data point filters are ambiguous if there are multiple data points on the target device with the same system name. Please make sure that each data point on a device has a unique system name.
- Missing data points and filters
The shape on the source schematic contains a data point which could not be found on the selected device. Either select a different device or make sure that the data point exists on the selected device. If necessary, reconcile or import your data points to the target device.
If you want to copy existing data points and filters from one system or client to another, we recommend you transfer them as follows:
On each device whose data points and filters you want to transfer, go to the Data Points and Filters tab.
If you want to export data point filters, select the parent data point filter in the sidebar in the left, and then click on More ▸ Export above the sidebar to download a list of the data point filters. Note that this file only contains the data point filters, i.e. their names and configurations, but no data points.
To export the data points, select them in the data point list (you can use the checkbox at the top left of the table to select all), and then click on More ▸ Export Data Point List at the top right to download them.
Warning
Some data points cannot be exported. If you encounter issues, try to unselect them and repeat the export.
On the target system or client, go to the Data Points and Filters tab on the respective device.
To import data point filters, click on More ▸ Import above the sidebar on the left and select the file that contains the exported data point filters.
To import data points, click on More ▸ Import Data Point List at the top right and select the file that contains the exported data points. Note that importing data points will only import the data points and their settings, but no recorded measurements.
If you import the schematics despite the warnings, these data points won’t be assigned to the shapes. However, you can try to re-import the file at a later point in time when the data points are available on the target system.