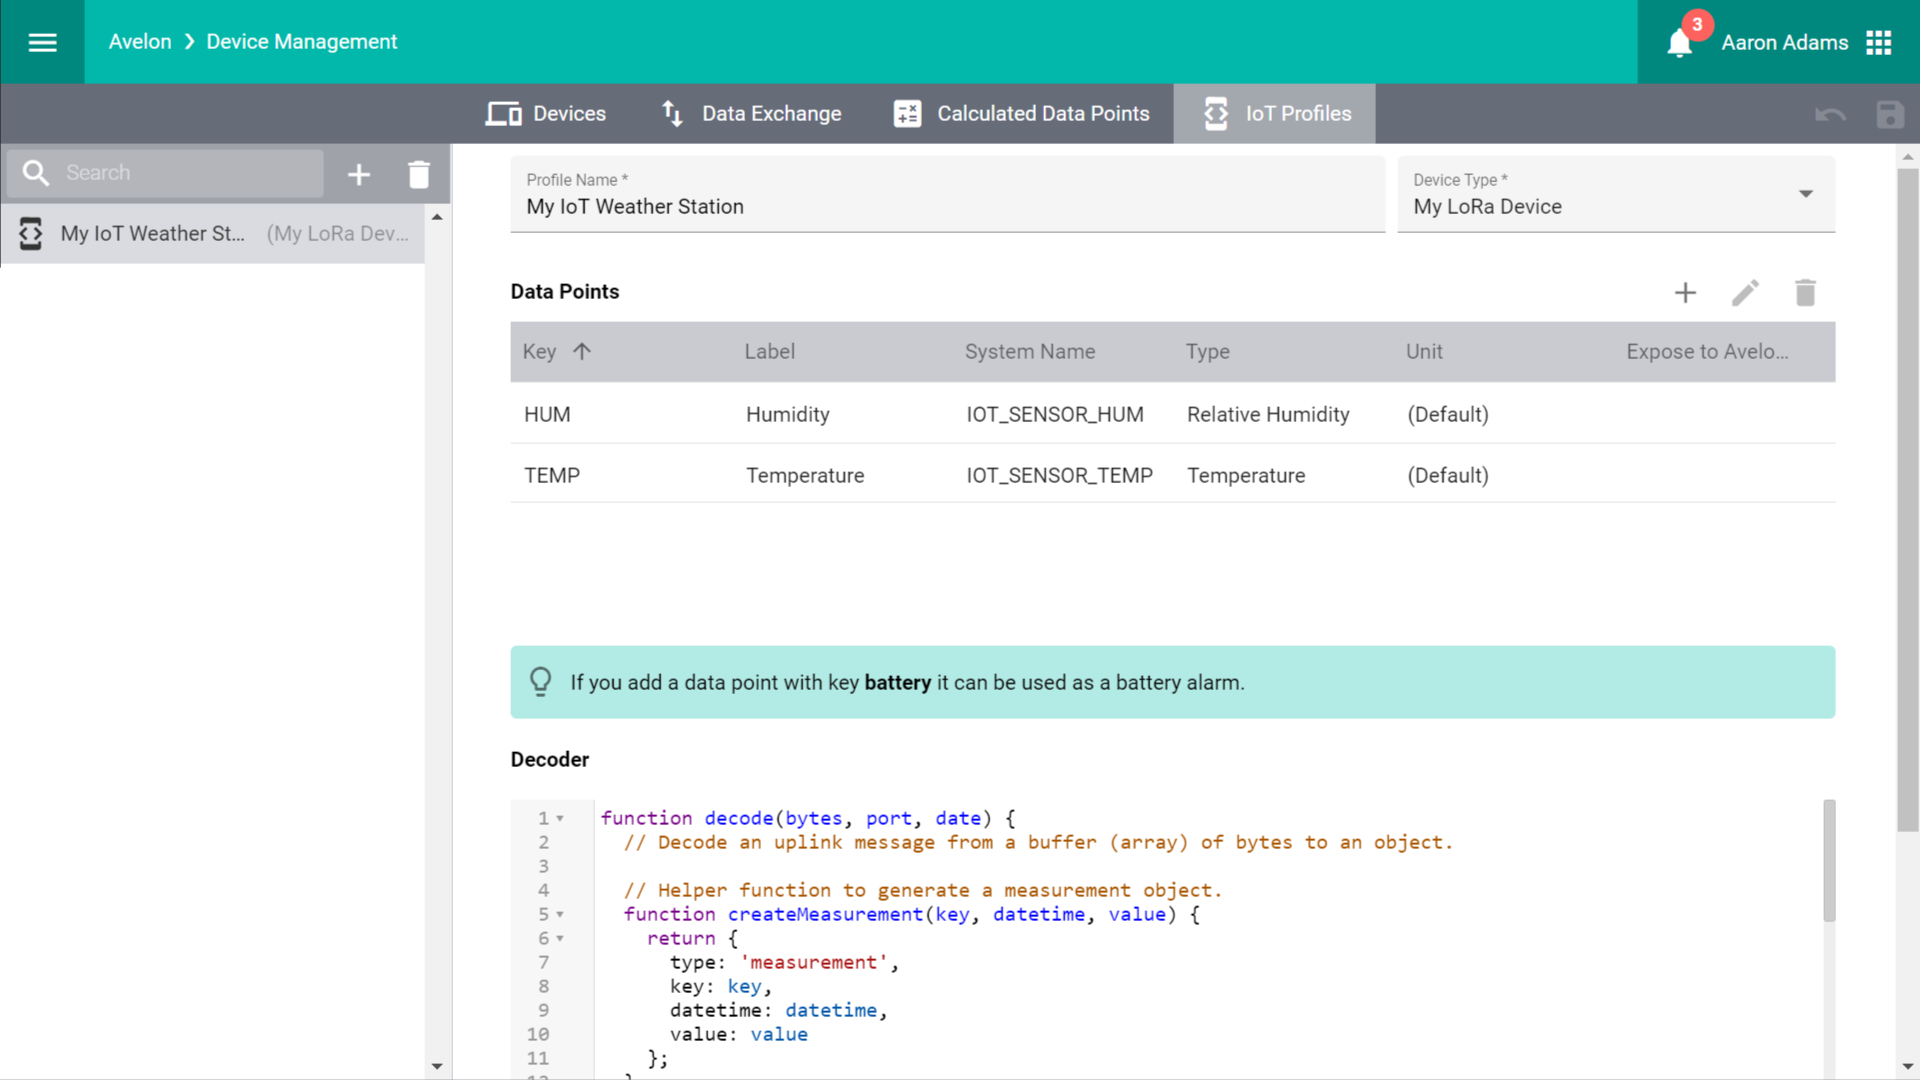
Edit IoT profiles
To edit IoT profiles, first go to the device management area by clicking on Devices at the top right in the user menu. Then select the IoT Profiles tab.
The sidebar on the left contains all IoT profiles that you have already set up. To create a new profile, click Add at the top of the sidebar and select which kind of IoT profile you’d like to create.
LoRa device profiles can be used for IoT devices that communicate via LoRaWAN.
MQTT device profiles can be used for IoT devices that communicate via MQTT.
You can now configure the IoT profile in the main view.

An IoT profile consists of a list of data point definitions and a decoding algorithm that converts the data from the device into these data points.
Note
If you create or edit an IoT profile, this initially has no effect on existing devices. Only when you assign the profile to a device (see Apply IoT profiles) are the data points created on the device and the decoder registered.
Profile name
Give the IoT profile a meaningful name, for example, the model name of the IoT device or its purpose.
Data points
In this table you can configure the data points that should be generated for every device to which the IoT profile is assigned.
- Key
A key that is unique throughout the table and with which the decoder can identify the corresponding data point. The key can be very short as long as it is unique and identifies the data point clearly, for example “temperature” or “meter01”.
Note
To be able to set up a battery watchdog on the device that issues an alarm when the battery level is low, you must mark one of the data points with the key
battery. This data point may only assume values from 0 to 100. Do not forget to read the current battery level in your decoder and assign it to this data point. Once you have assigned the profile to a device, you can set the battery alerting on the configuration page of that device in the Alerting section.Note
ThermoValve devices can have a temperature sensor (e.g. a Wisely or a custom LoRa device) assigned that will be used as the room temperature of the thermostat. If you create an IoT profile for a custom LoRa device that you want to use in conjunction with a ThermoValve device, the key of the temperature data point has to be set to
temperaturein the profile.- Name
The name of the data point as it is to be displayed later in the data point list, on charts or schematics.
- System Name
The system name of the data point to uniquely identify it in the system.
To ensure that data points get a unique system name even if you apply the IoT profile to multiple devices, you can use one of the following placeholders:
%DEVID%will automatically be replaced with the device identification (usually the device’s EUI).%DEVNAME%will automatically be replaced with the device name. Note that since the device name is localizable but system names are not, the system will use the device name in the language of the user who is assigning the IoT profile to the data point.
- Description
An additional description of the data point, for example its intended use or exact location or its component designation.
- Type
The data type of the data point.
- Unit
The unit in which the measurement values are recorded on this data point.
- Expose to the public web app
If this checkbox is selected, the data point will be displayed in the public web app that can be opened by scanning the QR code on the respective device. Note that the data point and its most recent measurements will be available in the public web app without a login. By disabling this option, the data point and its associated measurements will only be accessible from the regular Avelon user interface with a valid login.
Decoder
In this input field you define the decoding algorithm with which the messages from the IoT device is converted into the measurements or alarms of the individual data points.
The algorithm must be written as a JavaScript function decode.