Connect Modbus RTU bus to the Beetle
A D-sub socket (9-pin) is required for connecting the Modbus RTU line. A corresponding adapter from the terminal block to DB9F is included by default in the package of a Beetle with Modbus RTU licence.
Connect the two wires of the Modbus RTU bus to the socket as follows:
Beetle T6
Name of the wire | Pin on the Beetle connector |
|---|---|
Data+ or T+ | 1 |
Data- or T- | 2 |
When using the supplied DB9F to TB adapter, connect the wires to the adapter as follows. Please note that the two pins must also be connected with the supplied 120 Ω terminating resistor.
Interface | Pin assignment |
|---|---|
DB9F (D-sub) |
|
Terminal Block |
|

DB9F to TB adapter with terminal block (bottom) and D-sub 9 socket (top).
Beetle T5
Name of the wire | Pin on the Beetle connector |
|---|---|
A, -, N, Data- or TxD/RxD- | 2 |
B, +, P, Data+ or TxD/RxD+ | 3 |
When using the supplied DB9F to TB adapter, connect the wires to the adapter as follows. Please note that the two pins must also be connected with the supplied 120 Ω terminating resistor.
Interface | Pin assignment |
|---|---|
DB9F (D-sub) | 1 |
Terminal Block |
|

DB9F to TB adapter with terminal block (bottom) and D-sub 9 socket (top).
Modbus RTU and RS-485
Beetle T5 and T6 are shipped with RS-232 configured on COM1 and RS-485 configured on COM2. Modbus RTU requires RS-485, so please connect the wires to the adapter as described above and plug it into the COM2 port.
If you encouter any issues with Modbus RTU on COM2, please contact support.
If you encounter any issues with Modbus RTU on COM2, please make sure that RS-485 is enabled in the BIOS. Note that this does not apply to Beetle T6.
Requirements:
Computer keyboard with USB connection
Monitor with VGA connection and VGA cable
Proceed as follows:
Connect the Beetle to the power supply, monitor and keyboard.
Switch on the monitor.
Then switch on the Beetle.
Press the
Esckey on your keyboard quickly and repeatedly immediately after switching on.The BIOS configuration is displayed:
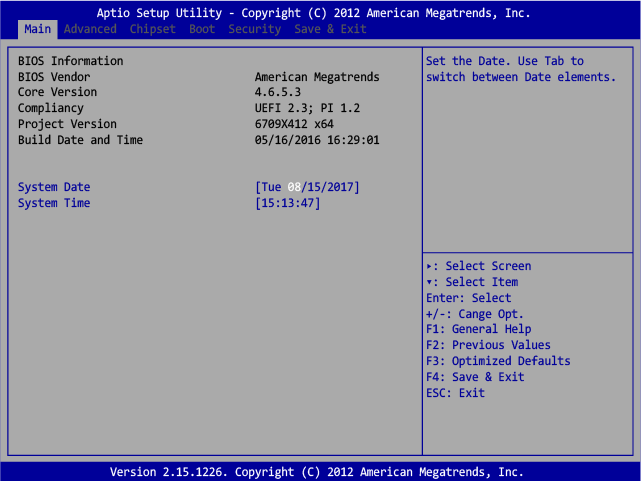
Use the arrow keys to navigate to the Advanced tab. Then press the down arrow key until the Super IO Configuration option is highlighted. Now press the
Enterkey.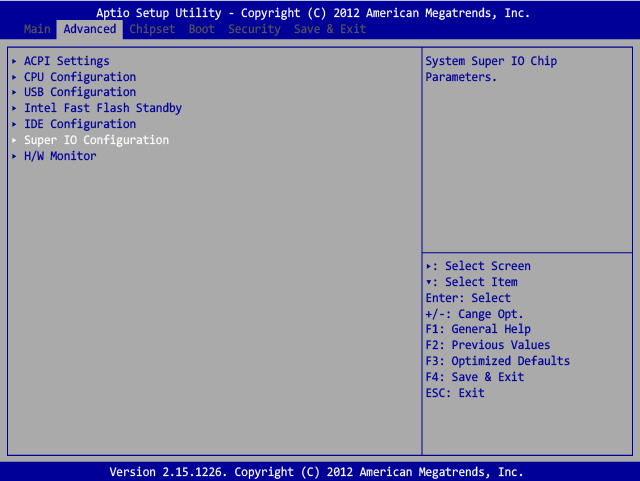
Press the down arrow key until Serial Port 2 Configuration is highlighted, then press the
Enterkey.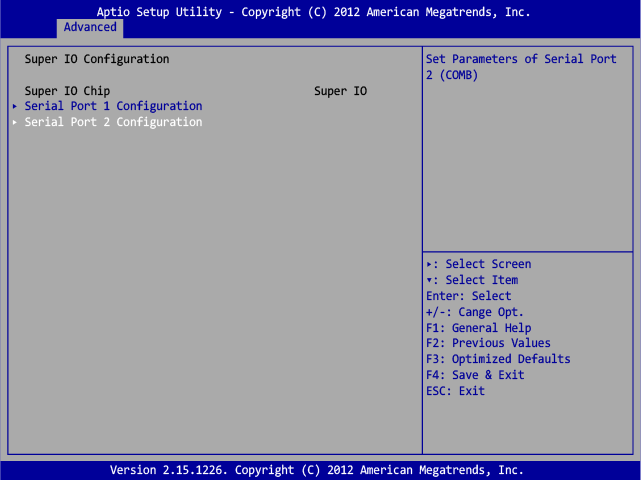
The dialog that appears offers you three options: RS232, RS485 and RS422. Use the arrow keys to select RS485 and then press the
Enterkey.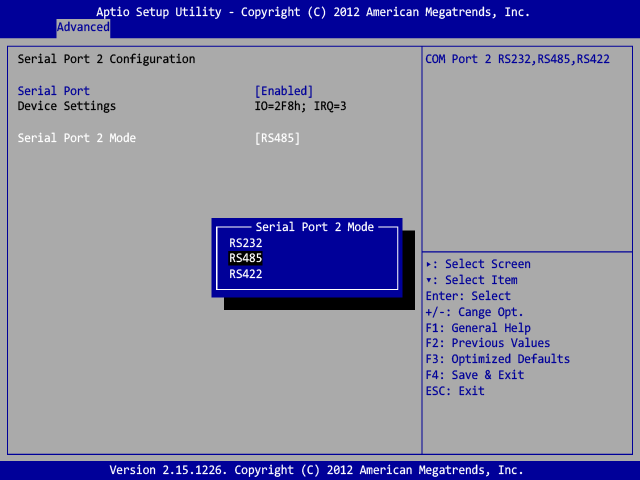
Press the
F4key to finish the configuration and confirm the Save & Exit Setup dialog with Yes.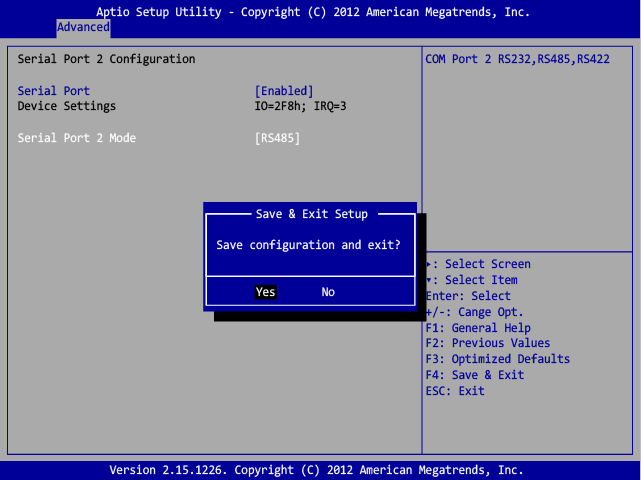
Modbus RTU devices can now be connected to your Beetle with the serial adapter.