System settings
On the System Settings tab you can monitor disk usage and manage TLS certificates.
Warning
System settings are only available on Alcedo Inhouse servers.
Partitions
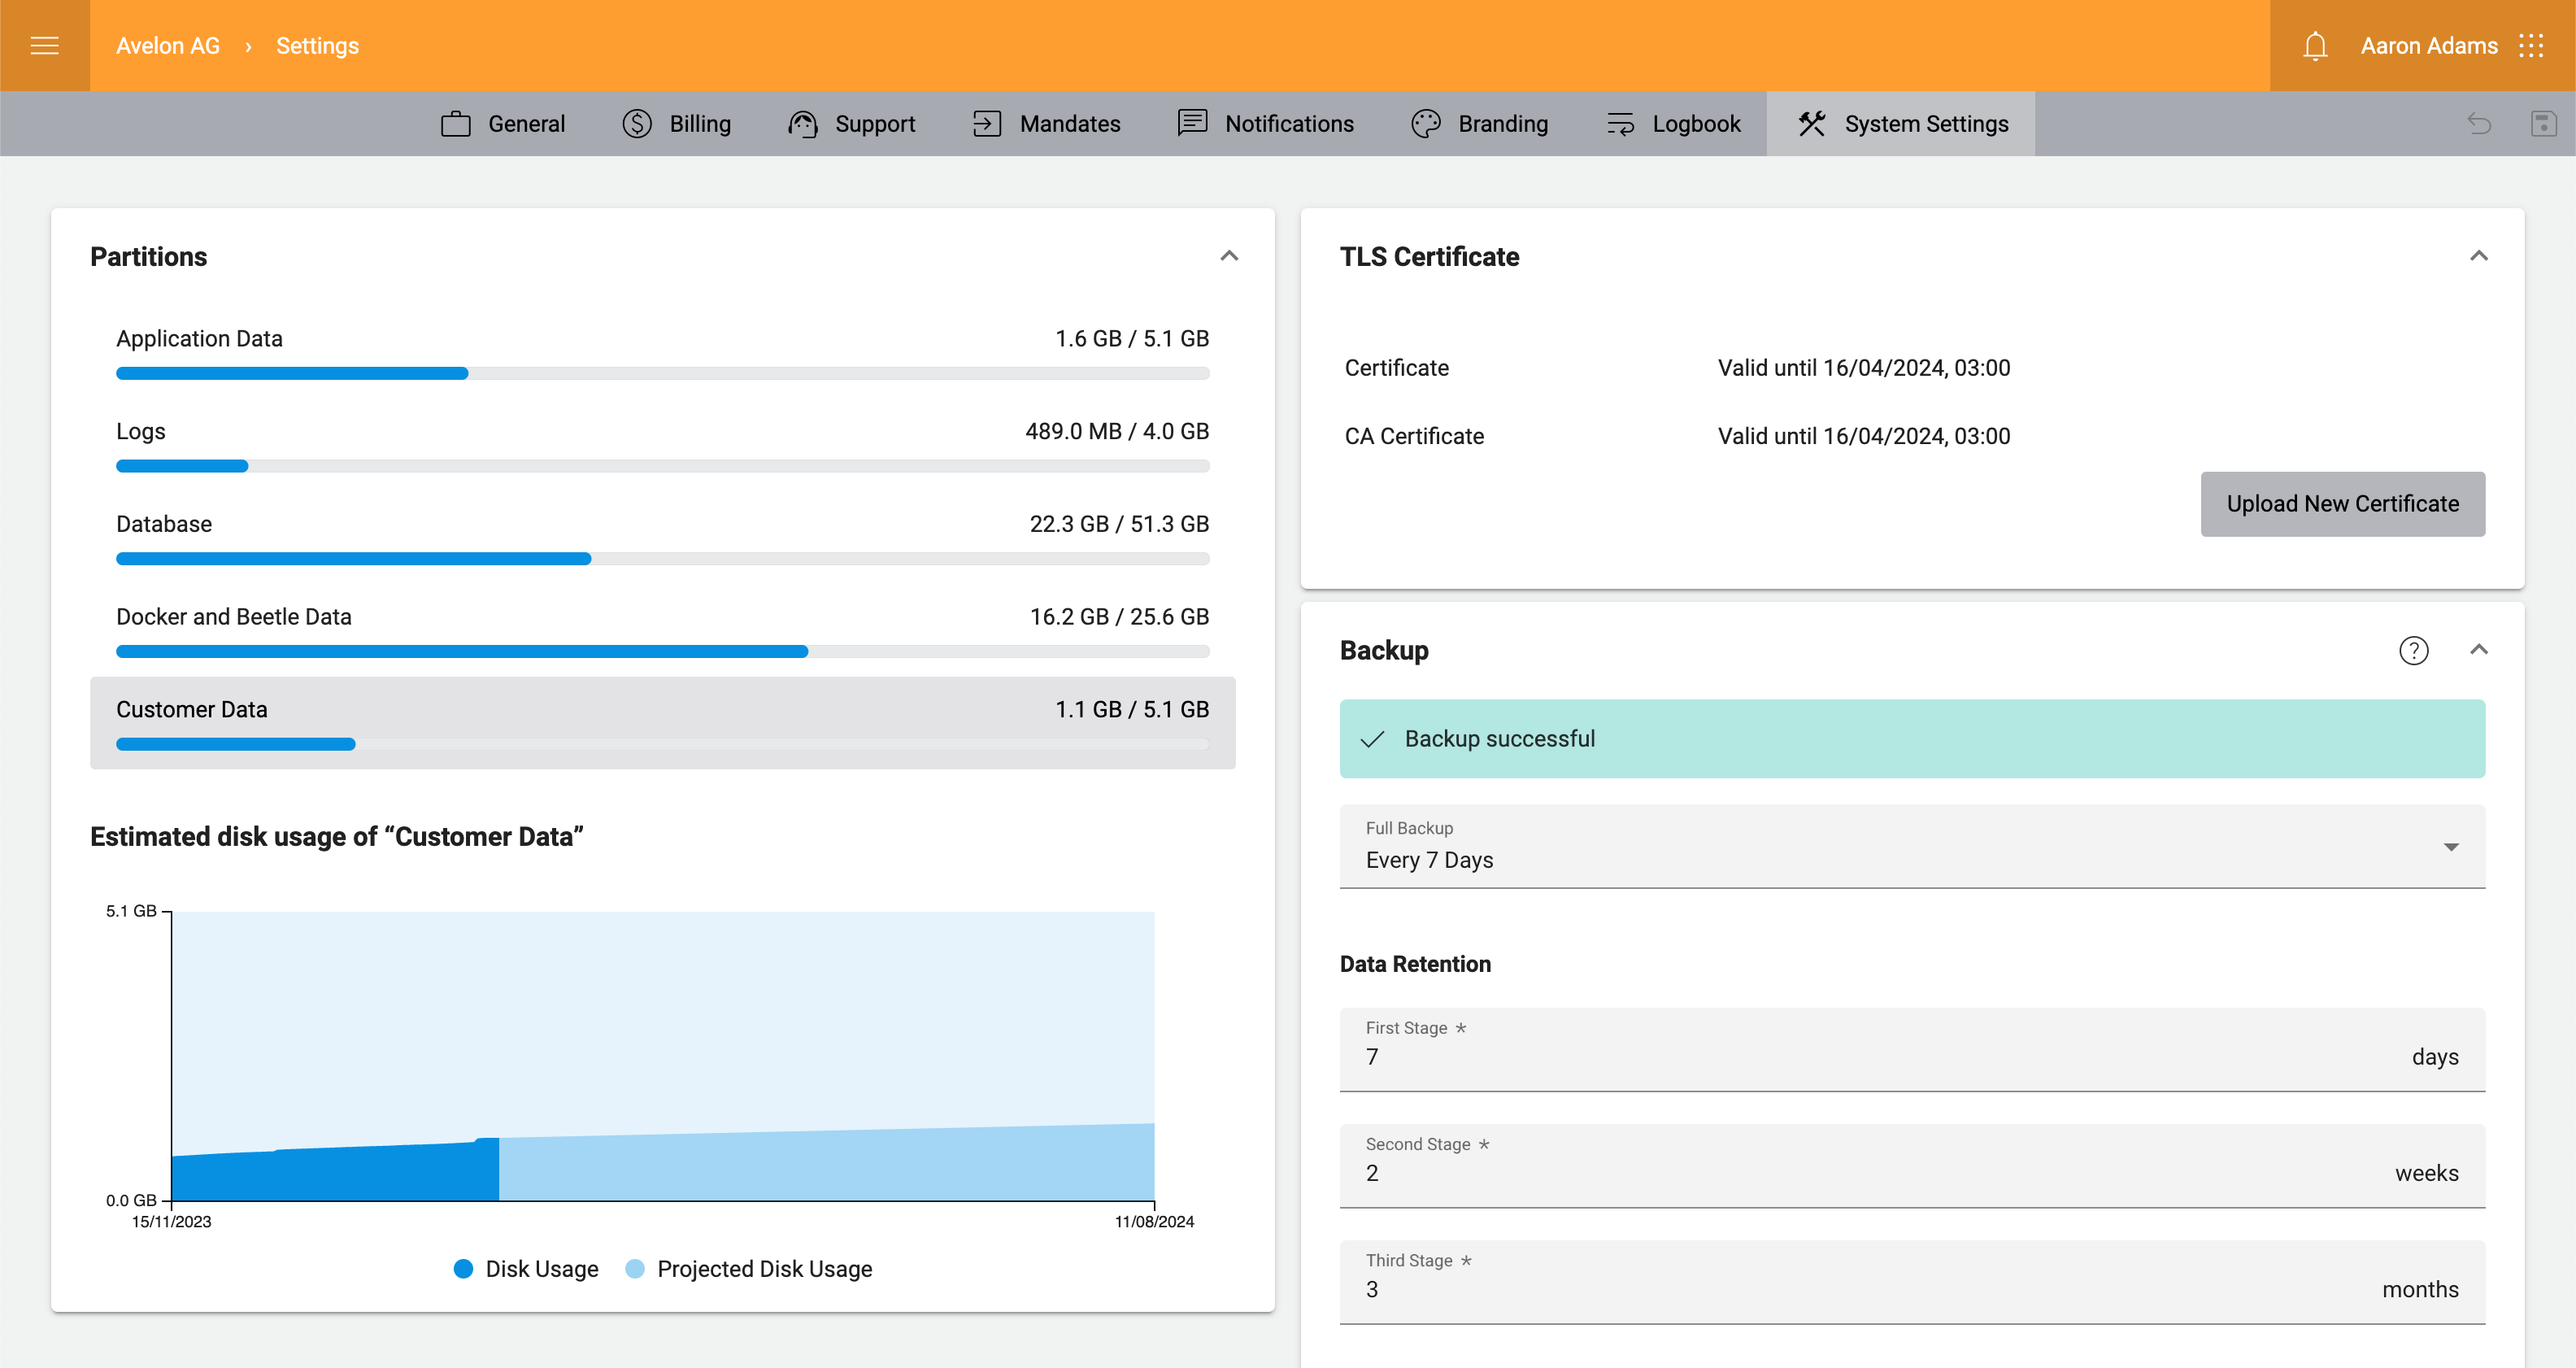
On this card, all partitions of the system are listed. You can see the total disk space of each partition along with the current usage.
Select a partition to show additional details below. The chart will show you the expected trend of memory usage based on historic measurements from the last three months.
Usually, the trend should have a very flat slope. If the slope is steep, it means that the disk is accumulating data too quickly and you should take action. Possible steps you can take are increasing the physical disk space, reducing the number of measurements that you collect from data points, or reducing the number of report jobs.
If you want to get notified before the disk usage reaches a ciritical threshold, enable system notifications as described in section Notifications below.
TLS certificates
In order to configure TLS certificates for your server, you can provide them on this card.
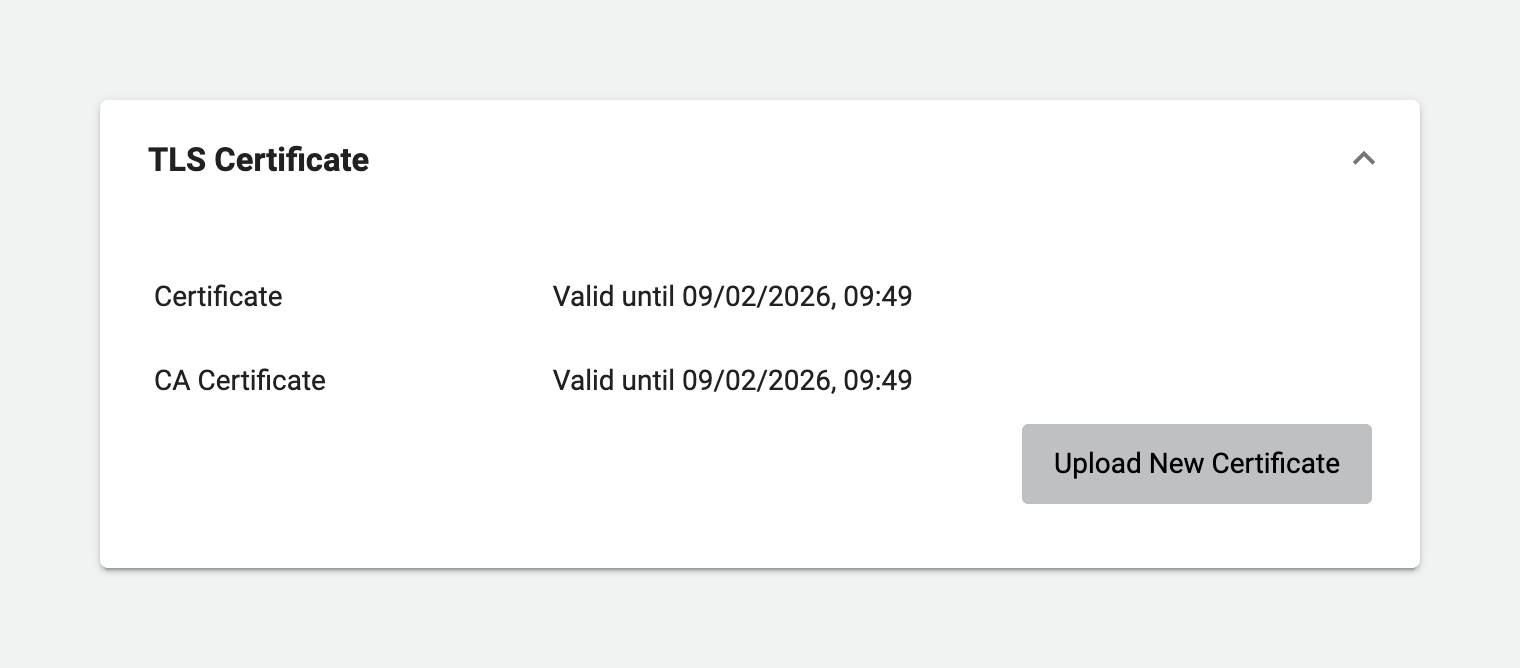
To upload a new certificate, click on Upload New Certificate.
In the following dialog, you can either upload your certificate files by clicking on Upload File and selecting the file from your computer, or by pasting the content of the certificate file directly in the text field.
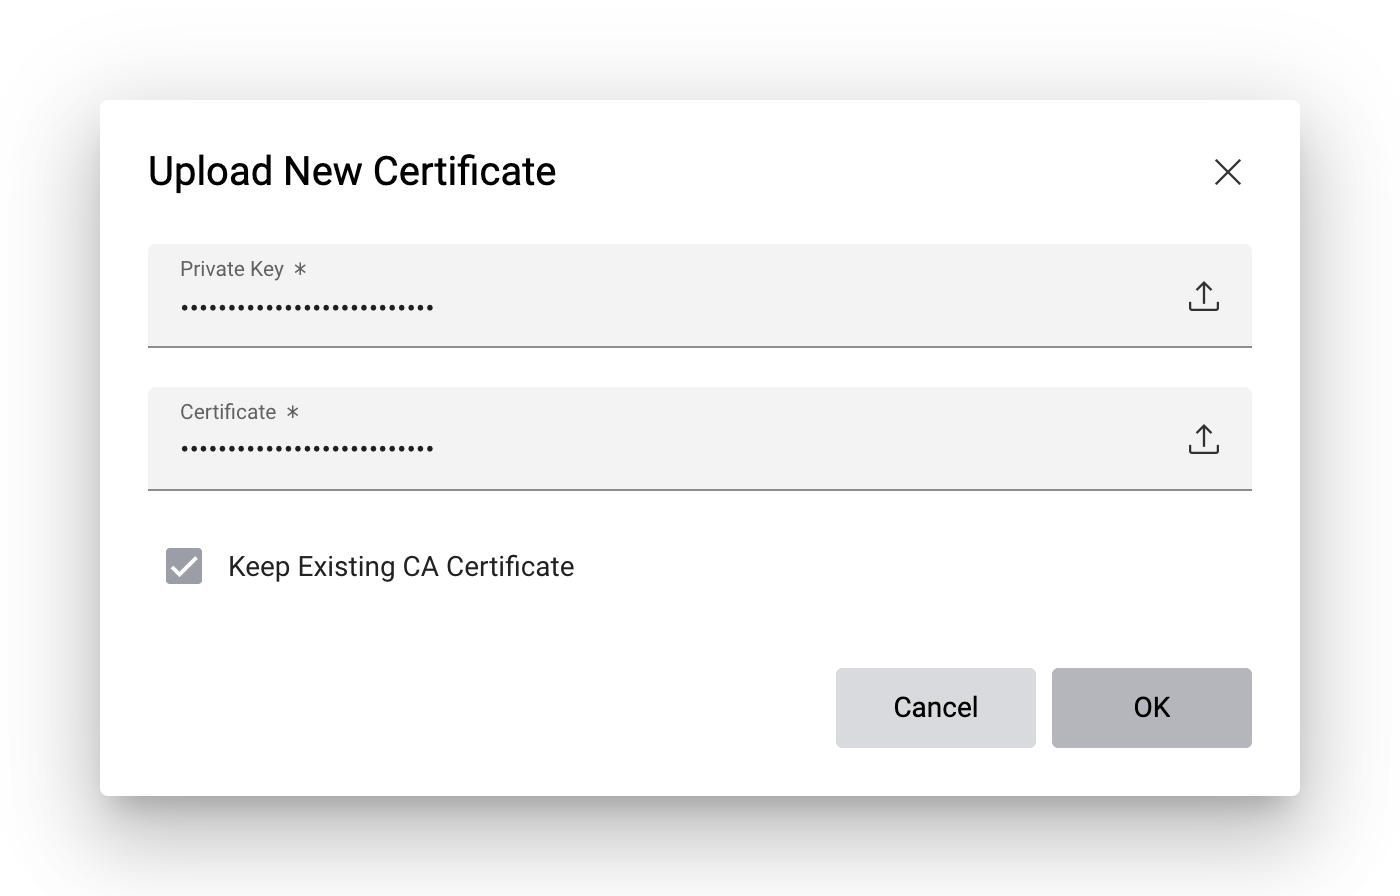
You have to provide at least the Private Key and Certificate. The CA Certificate is optional. You can either provide a new one or select Keep Existing CA Certificate to keep the existing CA certificate, if one was uploaded previously.
Click on OK to validate the new certificate. If there are any issues, an error message will be displayed at the bottom of the dialog accordingly. Otherwise, the certificate will be saved and the dialog will be closed.
If you want to get notified before a certificate expires, enable system notifications as described in the section Notifications below.
Backup
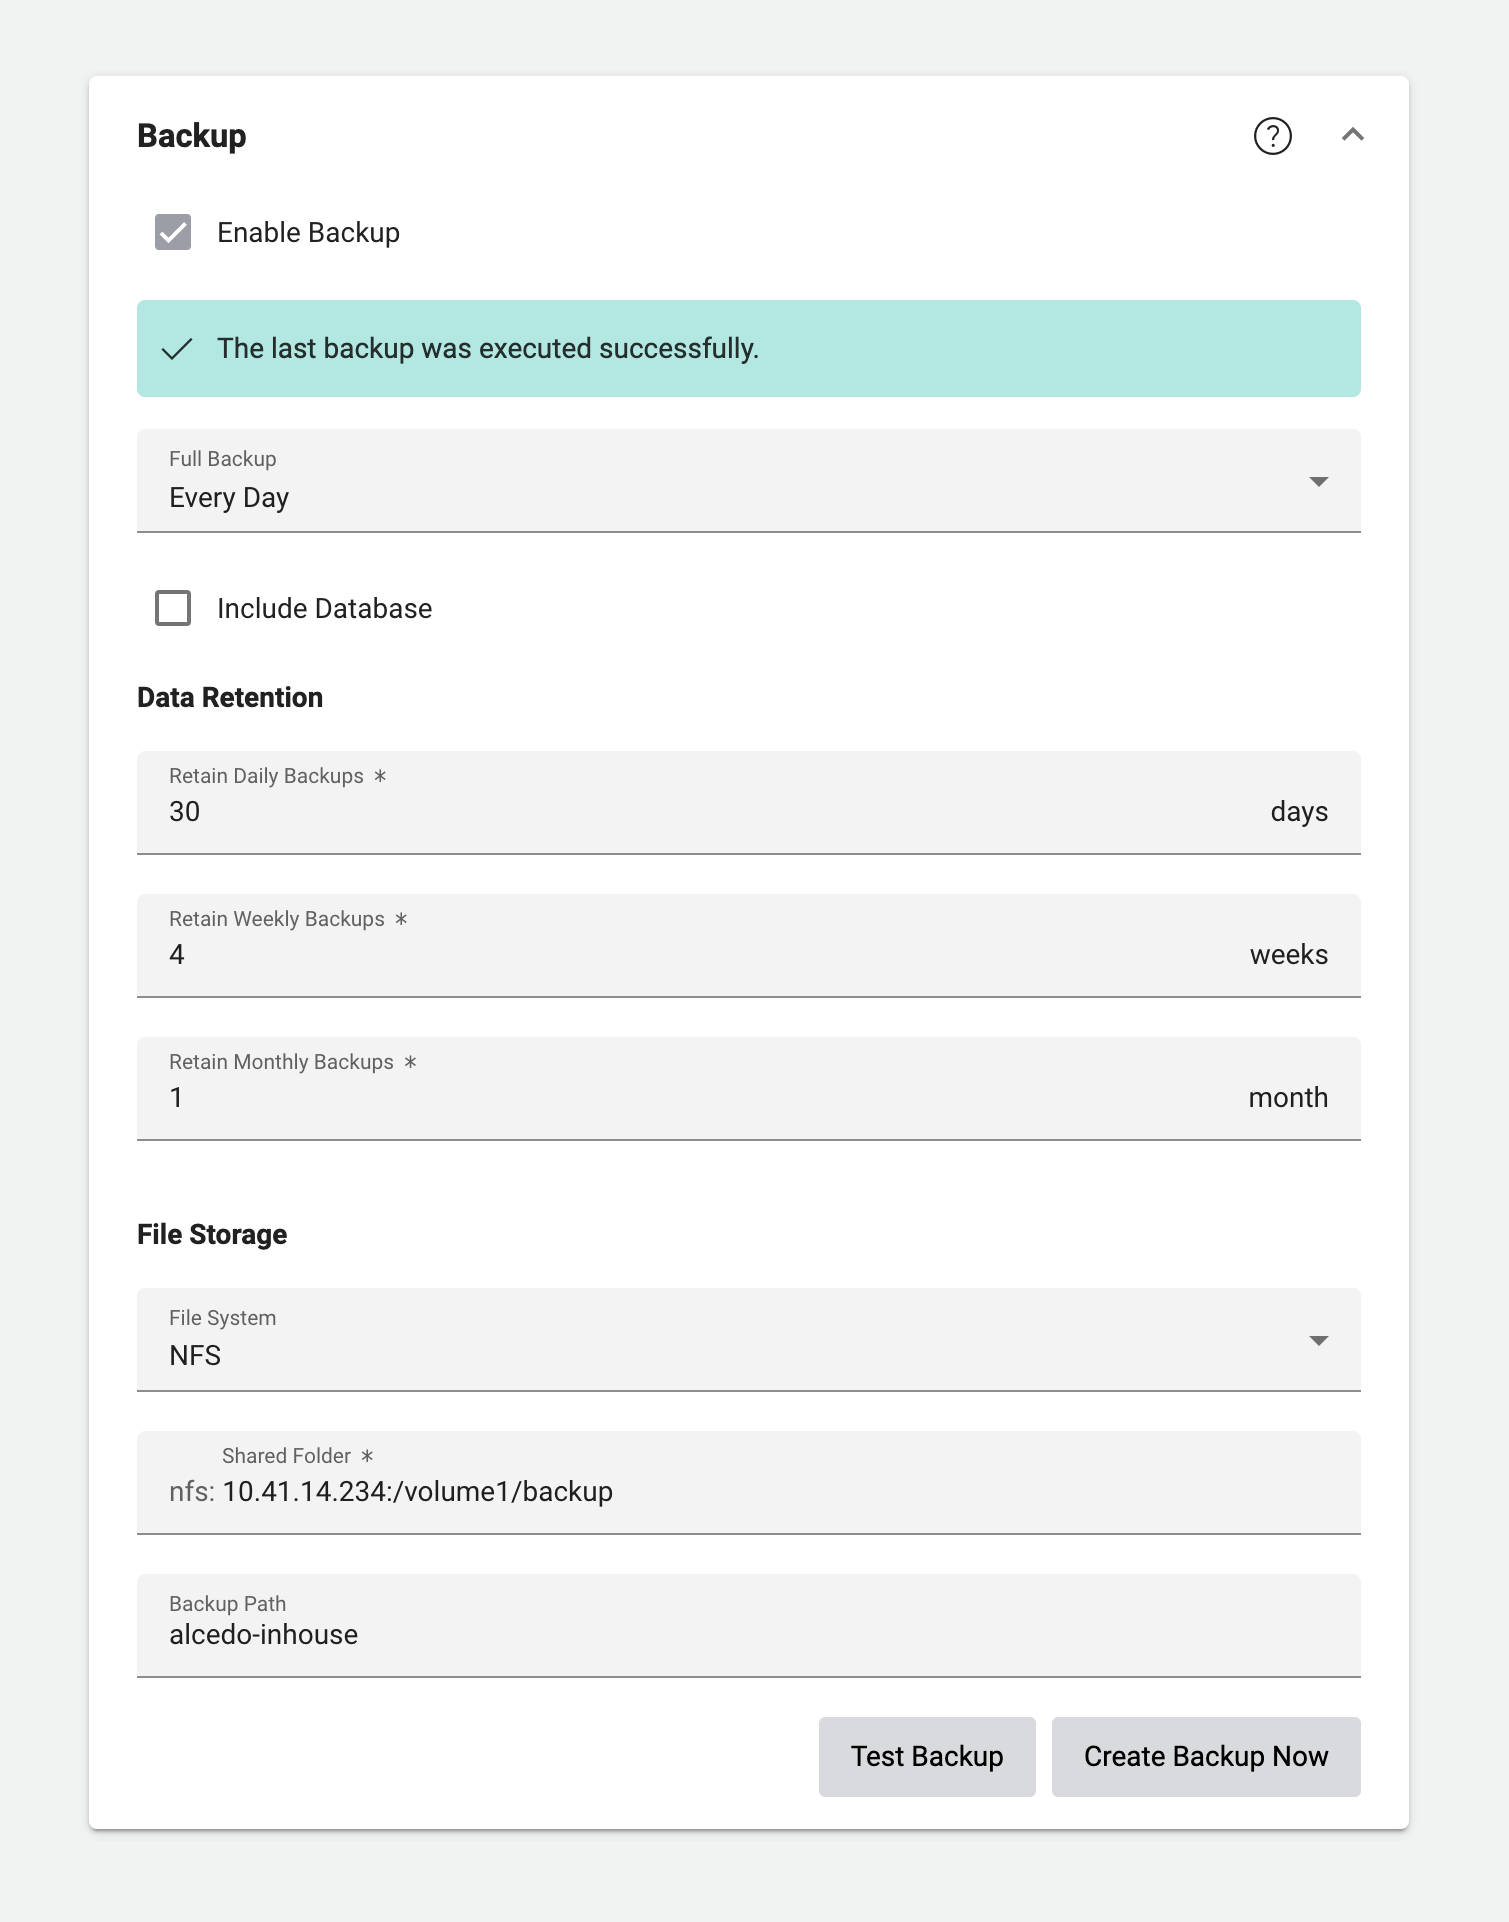
A variety of retention settings can be configured for the backup of the entire system.
- Full backup
Select the time interval between two full backups.
- Include database
Enable this option to include the database in the backup. The database contains all the project-related data, such as dashboards, data points, measurements, settings etc. Without the database, the backup will only contain the server configuration files, uploaded files and the backups of the Beetles.
Excluding the database from the backup is useful if you already have the database backed up by some other means and you only need to back up the file system of the server.
- Retention period
Define how long full backups should be retained. You can set the retention period for three different periods of time. This allows you to keep the most recent backups at a higher frequency, while older backups are retained less frequently.
- Retain daily backups
Specify for how long you want to retain daily backups.
If you set the frequency of Full Backup to Every Day, this will retain a backup for every day during \(n\) days, where \(n\) is the number of days that was entered in this field.
- Retain weekly backups
Specify for how long you want to retain weekly backups.
The last backup of each week is retained for \(7 \times n_{w}\) days, where \(n_{w}\) is the number of weeks that was entered in this field.
If you create a full backup every day, this will retain backups from Sundays. If you create a full backup only every couple of days, the day of week of the retained weekly backup can differ.
- Retain monthly backups
Specify for how long you want to retain monthly backups.
The last backup of each month is retained for \(31 \times n_{m}\) days, where \(n_{m}\) is the number of months that was entered in this field.
If you create a full backup every day, this will retain a monthly backup at the last day of the month. If you create a full backup only every couple of days, the day of month of the retained monthly backup can differ.
Backups that do not follow any of the three retention policies above will be deleted.
- File system
Select the file system of the backup storage:
NFS
SMB (CIFS)
- Username
The username to access the backup storage medium. Only available if File System is set to SMB.
- Password
The password to access the backup storage medium. Only available if File System is set to SMB.
- Shared folder
Enter the hostname and path to the share on the storage medium which should be mounted for the backup, e.g.
smb://example.org/nas/backups.- Backup path
Enter the path on the remote share where the backups should be saved. You can use this if you want to have a specific subpath created for the backup that is not yet present in the shared folder, or in case this path cannot be mounted directly. If the field is empty, the backups will be saved in the Shared folder directly.
Use forward slashes to separate subdirectories, e.g.
avelon/alcedo-inhouse.
You can click on Test Backup to test the backup configuration. The result of the test will be shown as a toast message in the bottom right corner.
If you want to manually run a full backup, click on Create Backup Now.
Data retention
A lot of data point measurements and tickets can accumulate during the operation of Alcedo Inhouse. If you notice that the Database partition fills up too quickly, you can reduce the data retention period of measurements and tickets. By default, the data retention period is preset to 10 years.
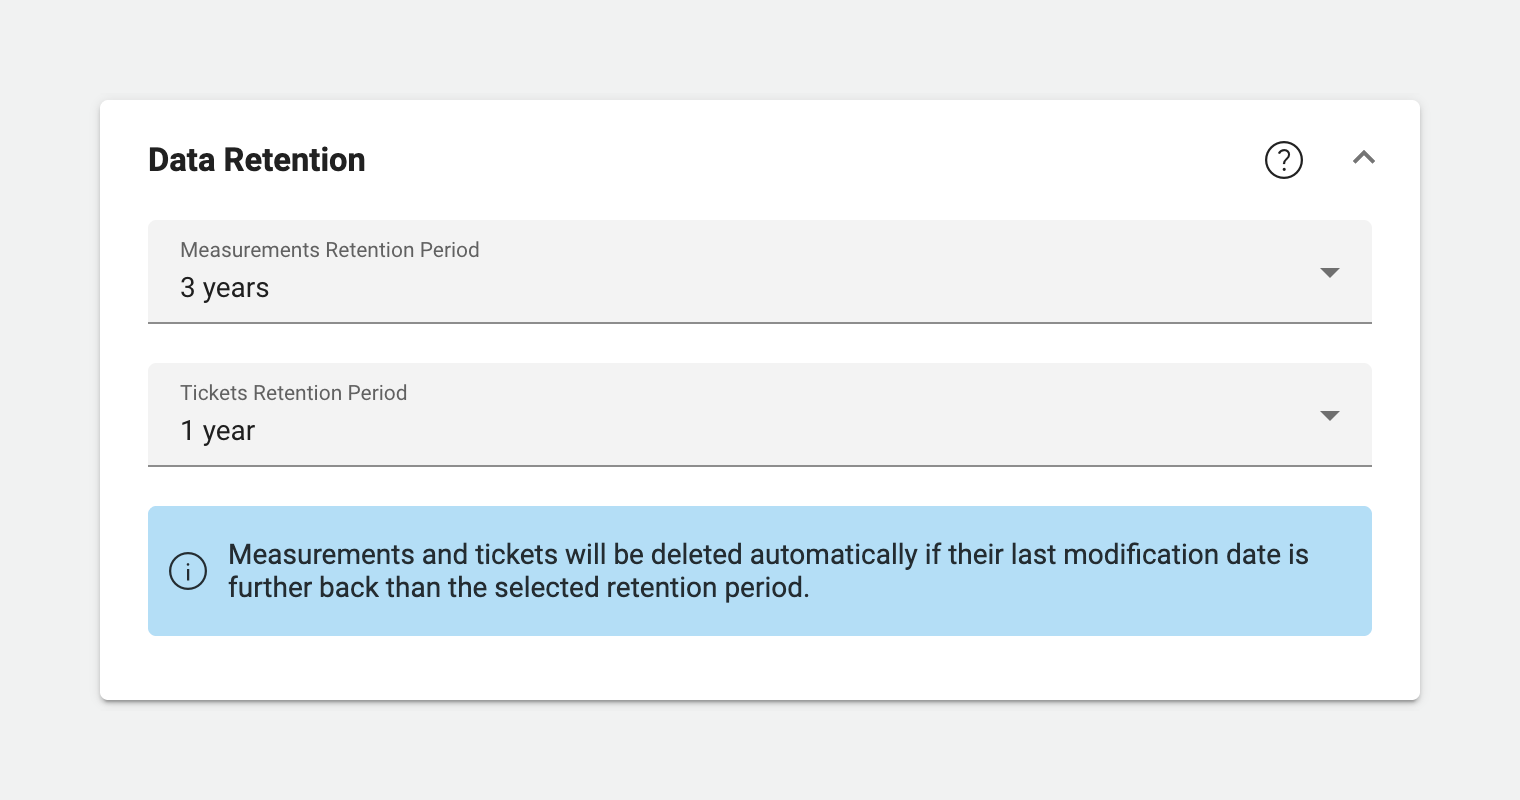
Select the appropriate data retention period from the Measurements Retention Period and Tickets Retention Period dropdowns, respectively, and the system will regularly delete data point measurements and tickets that are older than the selected period. For tickets, the last modification date will be taken into account.
Note that the records are not deleted immediately, but only at specific intervals. You might need to wait 24 hours for the system to clear the records from the database.
Warning
Please consult the regulations of your country regarding data retention before reducing the retention period. In some regions, it might be legally required for electronic data processing systems to retain data for a specific period of time.
Email server
Configure the SMTP server that Alcedo Inhouse will use to send system emails, such as notifications, alarms, or reports.
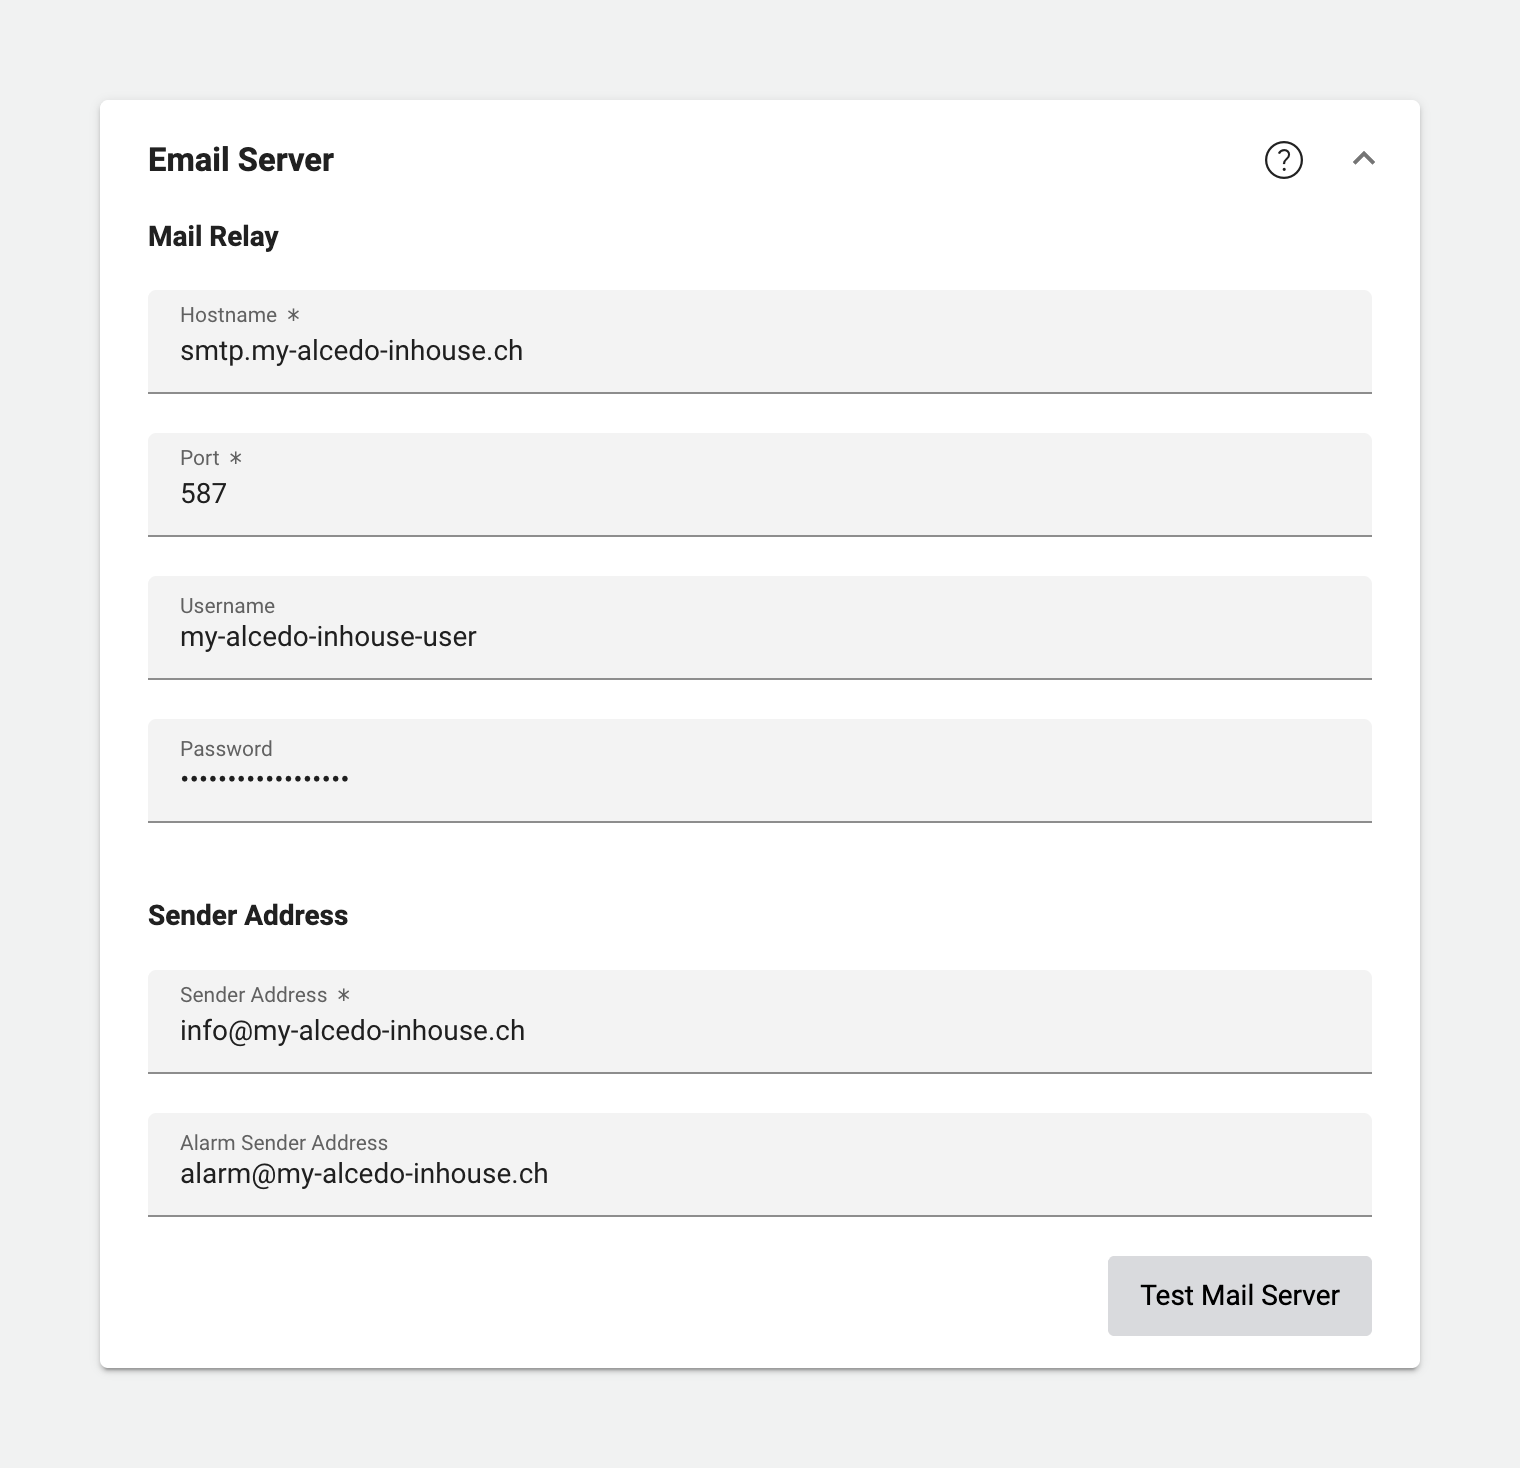
- Mail Relay
- Hostname
Server address of the SMTP server.
- Port
Port of the SMTP server.
- Username
Username for SMTP authentication.
- Password
Password for SMTP authentication.
- Sender Address
- Sender Address
Email address that will appear as the sender of the emails. This will be used for most system emails and notifications.
- Alarm Sender Address
Email address that will appear as the sender of alarm emails, i.e. alarms triggered by devices, data points or tenants. This field is optional. If left empty, the address from Sender Address will be used.
You can use the Test Configuration button to send a test email to verify that the email server is set up correctly.
SIP server
Configure the SIP server that Alcedo Inhouse uses to call users by phone. This is used if you want the system to notify alarm chain users by phone call, where the alarm text is read to the user.
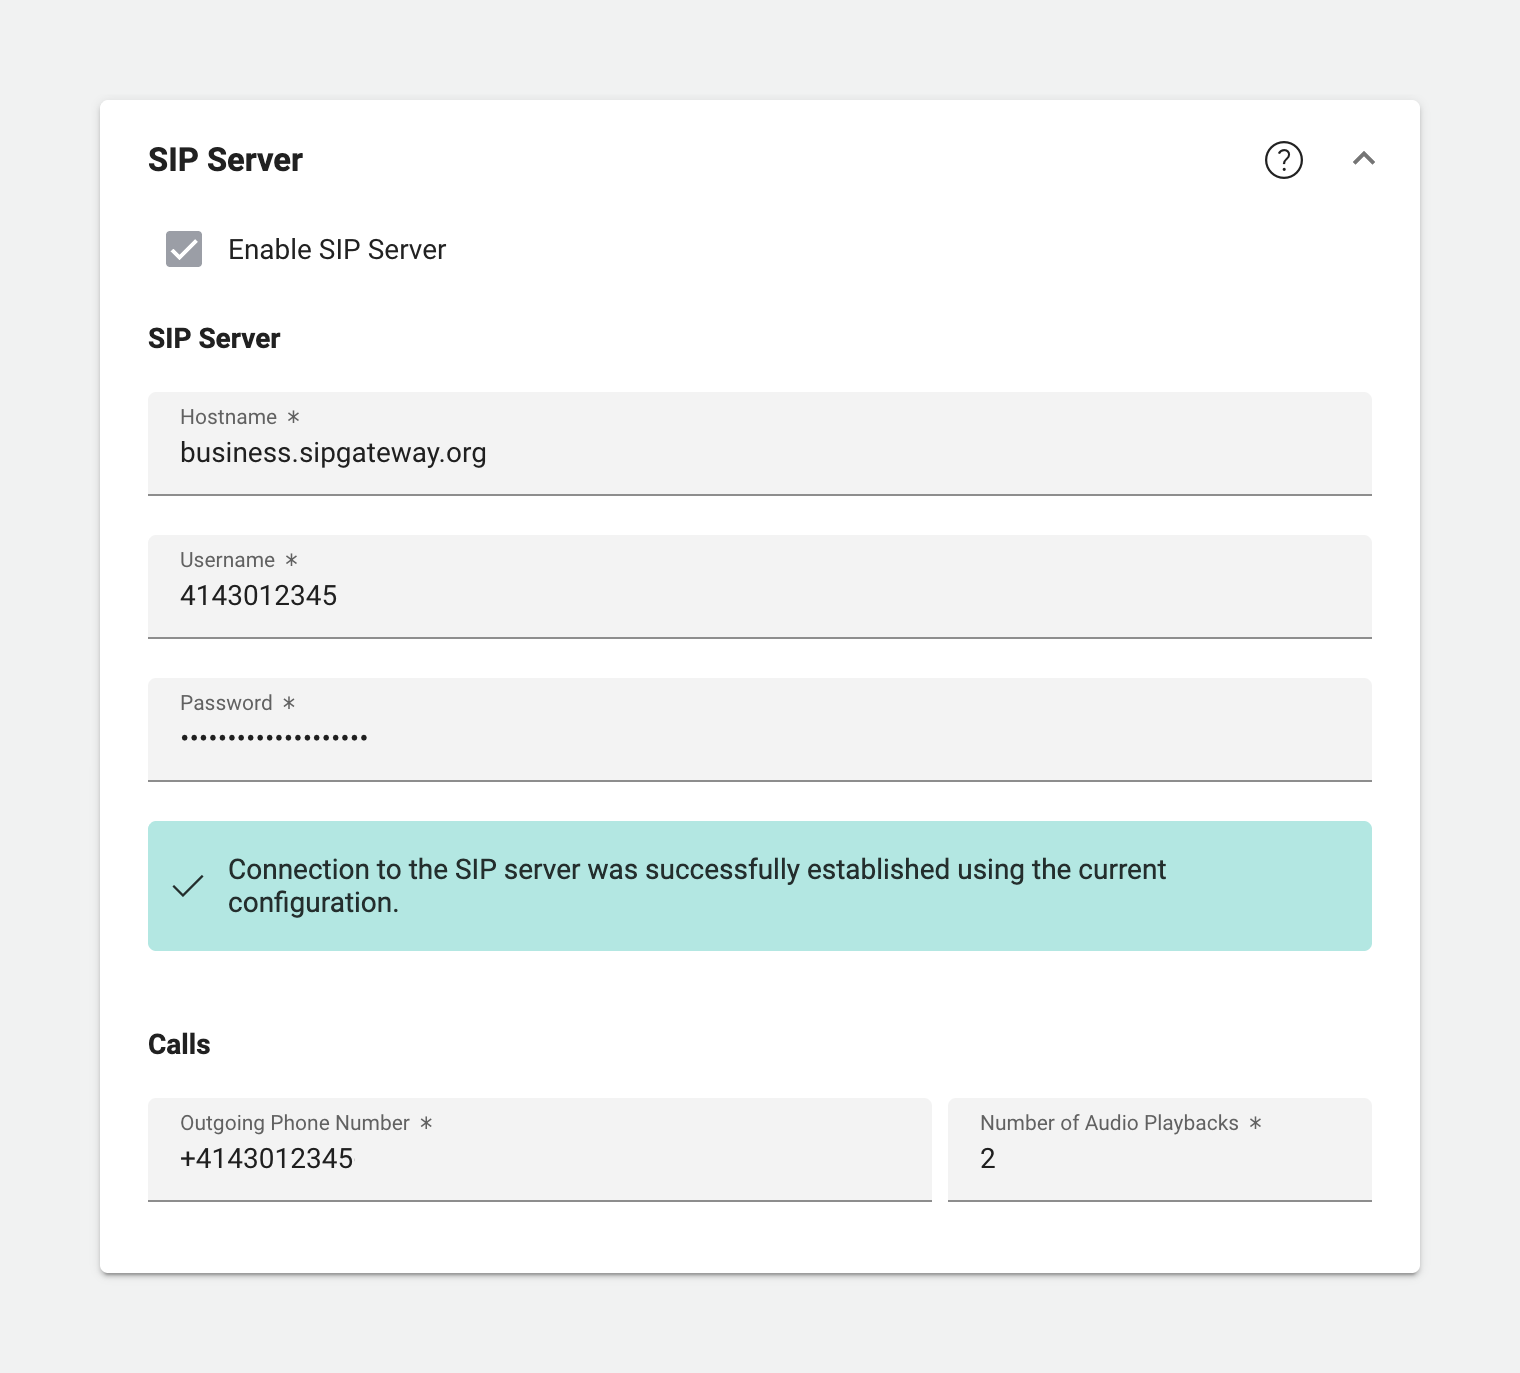
- Hostname
The hostname of the SIP server.
- Username
The username for SIP authentication.
- Password
The password for SIP authentication.
- Outgoing phone number
The phone number that will appear as the caller ID when Alcedo Inhouse makes a phone call. Enter the phone number in the international format, e.g.
+4143012345.- Number of audio playbacks
The number of times the alarm text will be played to the user during the phone call. This is set to 2 by default.
Note
In order for the phone call notifications to work, you need to make sure that Alcedo Inhouse can reach the configured SIP server, as well as api.elevenlabs.io via port 443, which is used to convert the ticket text into speech.
Notifications
The system can notify you in advance of critical issues. To configure these notifications, go to the System Alarms card on the Notifications tab.