GNSS tracker configuration
Click on the desired GNSS tracker in the device list to go to its configuration page. All relevant information about the device is displayed there.
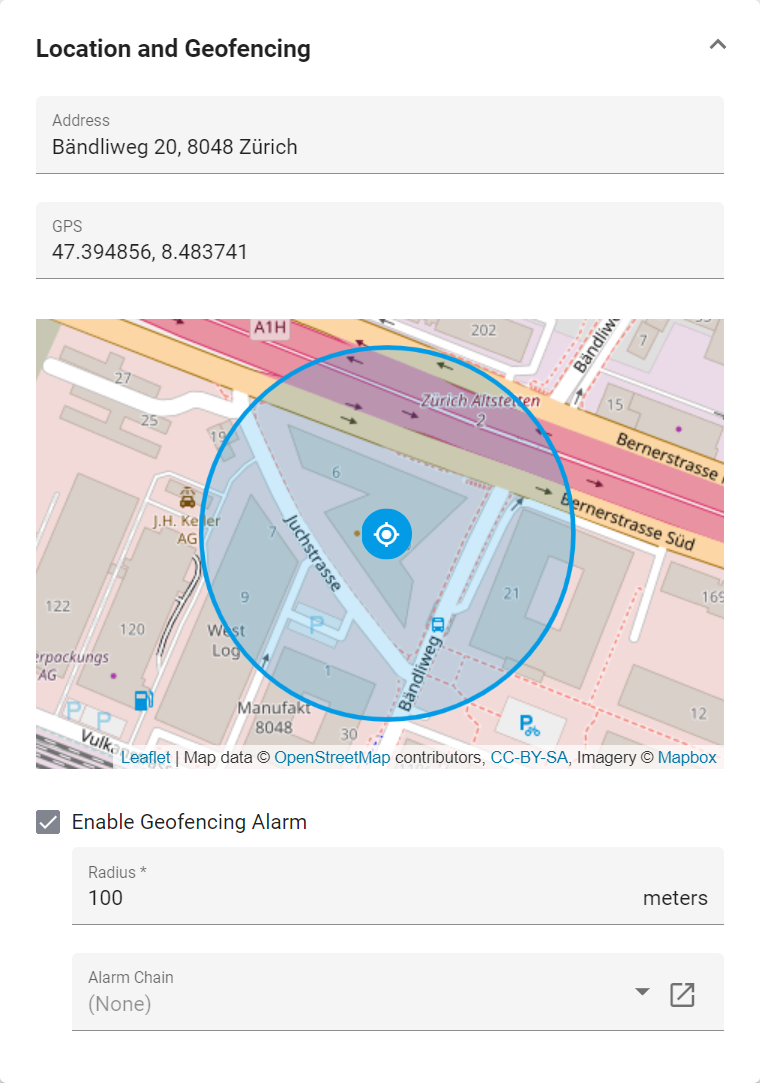
Detailed view of a GNSS tracker
General
- Model
The device model.
- Manufacturer
The manufacturer of the device.
- IMEI
The international mobile equipment identity, which is the unique global identifier of the device.
- IP
The IP-Address of the device.
- Last Connection
The date the device last communicated with the system.
- Activation Date
The date the device was registered on the system.
- Address
Use this field to configure the center of the geofencing area.
- GPS
If the address input above is insufficient, you can also specify the center of the geofencing area using GPS coordinates.
- Enable Geofencing Alarm
Enable this option to turn on geofencing. Whenever the device leaves the fenced area, an alarm will be generated.
- Radius
Enter the radius of the geofencing area in meters.
- Alarm Chain
Select the alarm chain that should be escalated when an alarm is triggered.
Note
To display the effective positions, routes and alarms of your GNSS trackers, place a GNSS tracking widget on a dashboard.
Alerting
- Enable Watchdog
Activate the watchdog to be notified if the device does not report in for a longer period of time. This allows you to react in time in the event of a device defect or insufficient transmission power. Select the desired alarm chain from the dropdown.
Warning
Watchdog alarm tickets cannot be closed until the device sends an acknowledgment that the alarm is gone and that the connection with the server is reestablished. As a result, when trying to close a ticket prior to device acknowledgment, the following error message is displayed: “This ticket cannot be closed. The alarm must be acknowledged by the device first”.
- Enable Battery Alarm
Activate the battery alarm to be notified if the battery falls below a certain threshold. Select the desired alarm chain from the dropdown.
- Enable Signal Disruption Alarm
Messages that are sent by the device contain a timestamp, the current coordinates of the device and the number of satellites which the device had been in contact with. If the number of satellites remains 0 for the specified amount of time, an alarm will be raised. The data point Signal Disruption keeps track of this alarm state. Select the desired alarm chain from the dropdown that should be triggered when a signal disruption alarm is raised.
Since the detection of signal disruption depends on a reliable communication between the device and our server, we recommended to also enable the watchdog for this device, so that you’ll also be notified when the communication between the device and the server is interrupted.
Setting an alarm
You can add an alarm for any of the data points assigned to the GNSS tracker. The available data points are displayed on the Data Points card. To add an alarm for one of the data points, proceed as follows:
Select the data point by clicking on Go to Data Point on the right hand side.
Under Alerting, define an upper and/or lower alarm limit value.
Select the alarm chain to be invoked in the event of the alarm. For information on how to set up alarm chains, see Manage alarm chains.
With the value Deadband for gone alarms relative to the limits you can also set the difference relative to the alarm limit value as of which any alarm that occurs should automatically be marked as “gone” by the system. For more information on how to edit data points, see Edit data points.
Save your changes by clicking on Save at the top right in the toolbar.
Warning
If you only have a free Heads-up! license on your device, only alarm chains with one user and email notification can be selected. In order to add more users to the alarm chain and to receive alarm notifications via SMS also, a paid Heads-up! license needs to be purchased.
Note
To purchase additional licenses for the device, please click Shop, available on the Licenses card. You will then be redirected to the Avelon Shop. This function is only available on Avelon Cloud.
Download labels
You can download or print the labels, which are factory affixed to the outside of the case, at any time. Different labels are available depending on the device type. The front label contains the QR code needed to use the device in our IoT app as well as a marker used in connection with its augmented reality function. The back label contains technical information about the sensor, such as the serial number or device EUI.
You can download or print the two labels by clicking on More at the top right, then on Front Label or Back Label respectively, and then on either Download or Print.
Schematic link
It is possible to jump directly from the IoT app, which you can open via the QR code of one of our IoT devices, to a specific schematic, for example to control the parameters of the air conditioning system. You can specify which schematic is to be opened under Schematic Link.
If you also select a data point filter, the system will try to dynamically fill the data points on the schematic using this data point filter. However, this only works if the system names in the shapes used are set in such a way that a unique assignment of data points from the selected data point filter to the shape is possible.
As soon as the link is set up, a corresponding link to the schematic appears on the IoT app.
Licenses
See Licenses.