GNSS tracking widget
This chapter describes the GNSS tracking widget that can be placed on dashboards.
To learn how to insert widgets into your dashboard, please read the chapter on Widgets.
Introduction
All your supported GNSS tracking devices are displayed in the sidebar on the left. Select one of these devices to show their current position, their position history and other settings.
To go to the configuration page of the device, click on the device card at the top right.
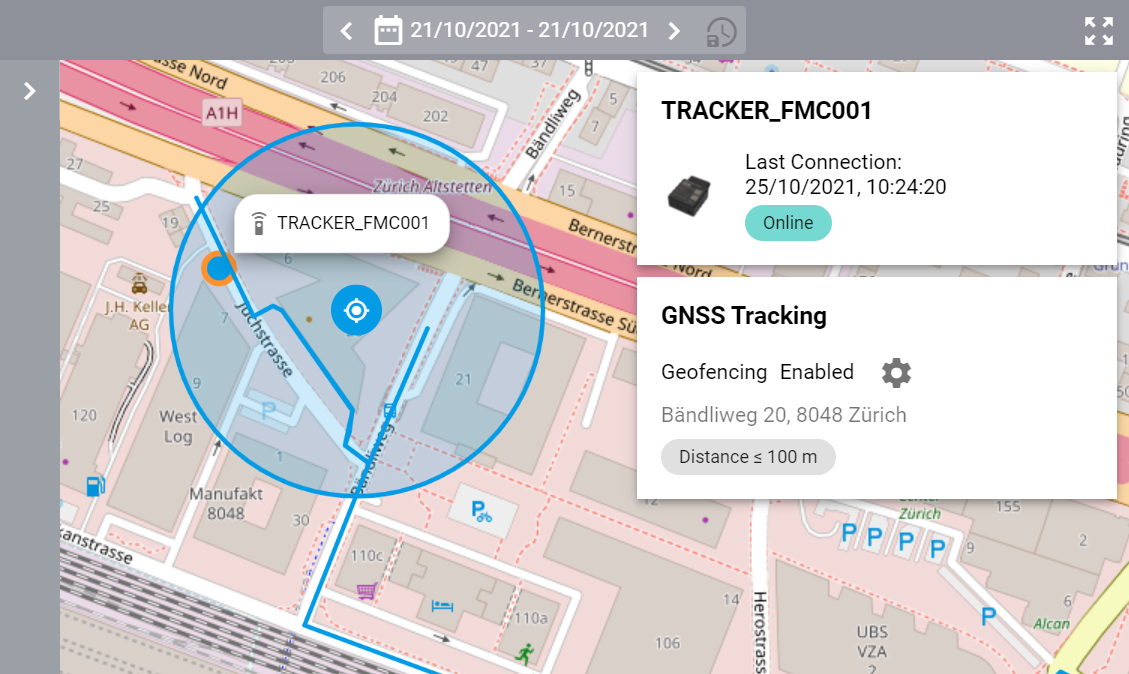
Configure Location and Geofencing
Click on Configure Location and Geofencing on the GNSS Tracking card on the right to configure the device’s expected position and an optional geofencing alarm.
To enable the geofencing alarm, enable the option Enable Geofencing Alarm below the map preview. Then enter the radius of the geofencing area in meters and select an alarm chain that should be triggered when the device leaves the specified area.
Click Save to save the changes.
Alarms
If a device with an active geofencing restriction leaves its designated area, an alarm ticket will be generated, and the alarm chain will be triggered. All past and present alarm tickets can be viewed in the Alarms panel at the bottom of the screen. Since the handling of this panel is similar to the ticket list widget, please refer to this page for further details about tickets.
History
In the History panel at the bottom of the screen, all past locations of the selected device are displayed in a table. See the device’s latitude, longitude and altitude from any point in time.